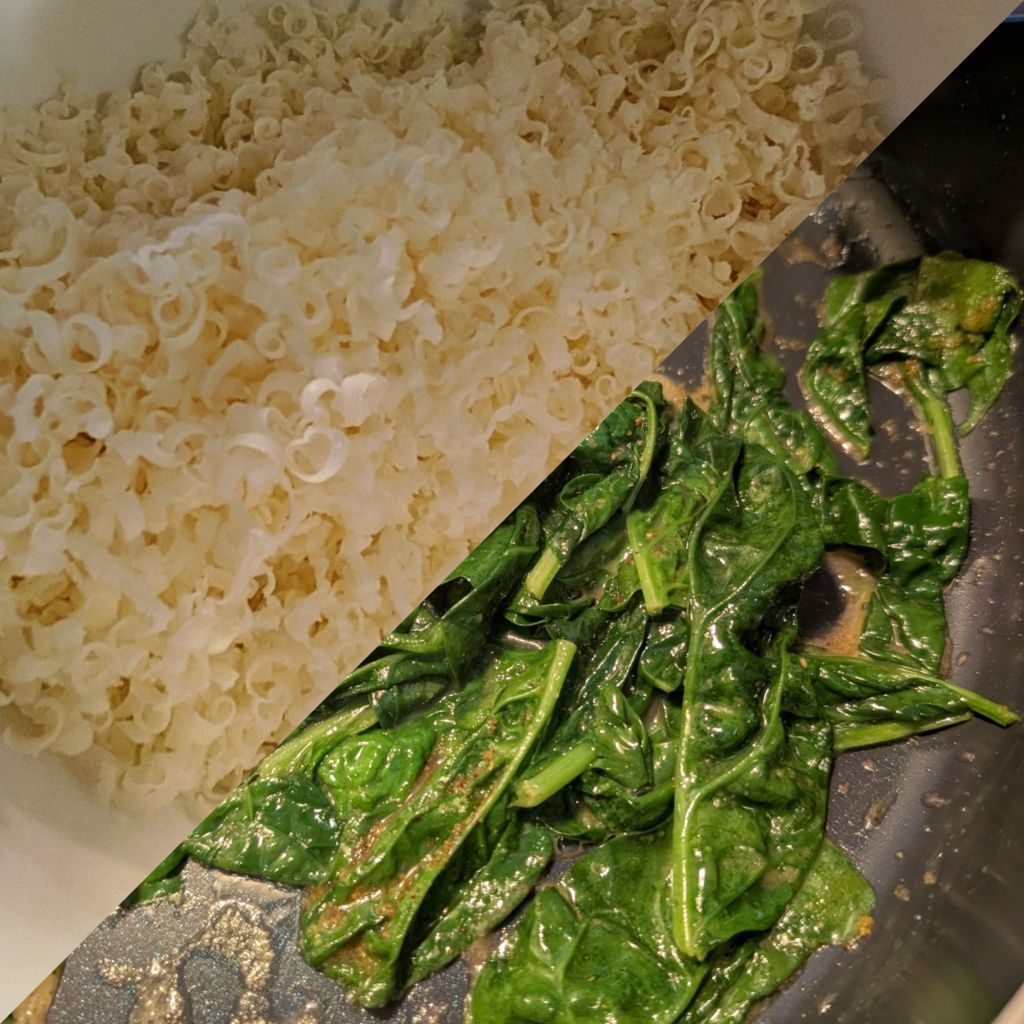
What if soup, but sandwich? Wedding Soup Meatball Subs.


So, you know I like to make soup. And you know I’m a fan of meatball subs (& meatball clubs! Join the meatball club). I made my version of wedding soup recently, and it was pretty good. I remarked it’d be good to have a meatball sub with those flavors, and everyone in the family seemed to agree. So, here we are.

Yinz wanna jump to the recipe?
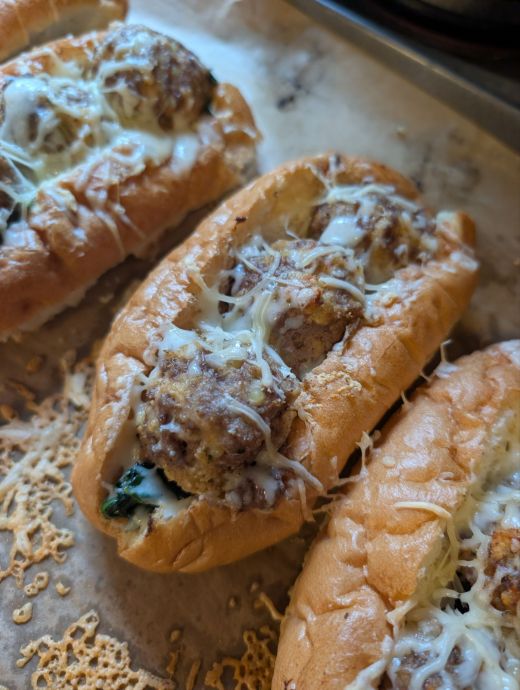
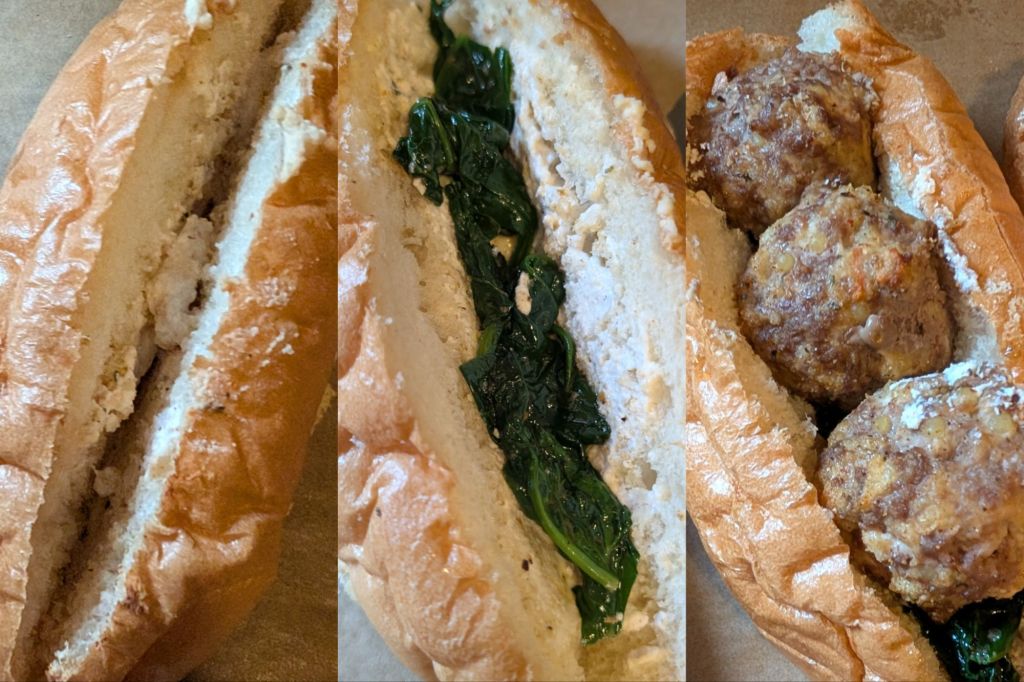
A hearty meatball sub inspired by Italian wedding soup, featuring tender meatballs, greens, and melted cheese on a toasted hoagie roll.
A toasted wedding-soup inspired meatball sub cut in half on a plate, served alongside a warm bowl of flavorful golden brodo di bollito.

Lots of other people have done this and there are certainly other recipes out there, but as always I did my own take here. I get real tired real quick on foodie gatekeeping about the “right” way to do stuff, as it recipes and ingredients haven’t always changed across generations, borders, & families.

I had what I wanted to do and a taste I was going for in my head, and it definitely hit the mark. My son tasted a meatball before we made a sandwich and he said the meatball tasted exactly like wedding soup. I’ll take that!

I ended up making a broth on the side to kind of have like a a French Dip sandwich. Google says it’s a Brodo di Bollito. I took the bun that I messed up, but it still looks pretty good. I’ll try to make the recipe concise below. I just kind of throw stuff together, don’t measure, and hope it works.

How would you do yours? I present this as a guide and a reminder for myself the next time I make these. I encourage you to make it your own. Here’s what I did, I’ll try to present it as a recipe:

Ingredients:

  • 1.5 lbs. ground beef
  • 1 lb. ground chicken
  • 2 large eggs
  • 2 Tbsp. milk, splash
  • ⅓ cup plain breadcrumbs
  • ⅓ cup panko breadcrumbs
  • ½ cup grated Parmesan (for meatballs)
  • ⅓ box (1 lb.) acini di pepe
  • 1 cup matchstick carrots, finely chopped
  • 1½ celery stalks w/ leaves, finely chopped
  • ½ Spanish onion, finely chopped
  • 4 Tbsp. butter (for sautéing mirepoix & wilting spinach)
  • Dash of extra virgin olive oil, for sautéing mirepoix
  • Seasonings! (To taste, throughout.)
    • onion powder
    • garlic powder
    • black pepper
    • Dash table blend
    • paprika
    • dried parsley
    • Italian seasoning
    • rotisserie chicken seasoning
    • poultry seasoning
  • 3 tsp. jarred minced garlic (I know, I know, the internet hates this. Use fresh then.)
  • 1 (32 Oz.) box chicken stock
  • 1 (32 Oz.) box chicken broth
  • 1 beef bouillon cube
  • 1 cup whole-milk ricotta
  • 4 cups fresh spinach
  • 4 hard rolls, split on top
  • 1 cup fontina, freshly shredded
  • ½ cup fancy shredded Parmesan, for topping

Method:

  1. Preheat the oven to 400° F.
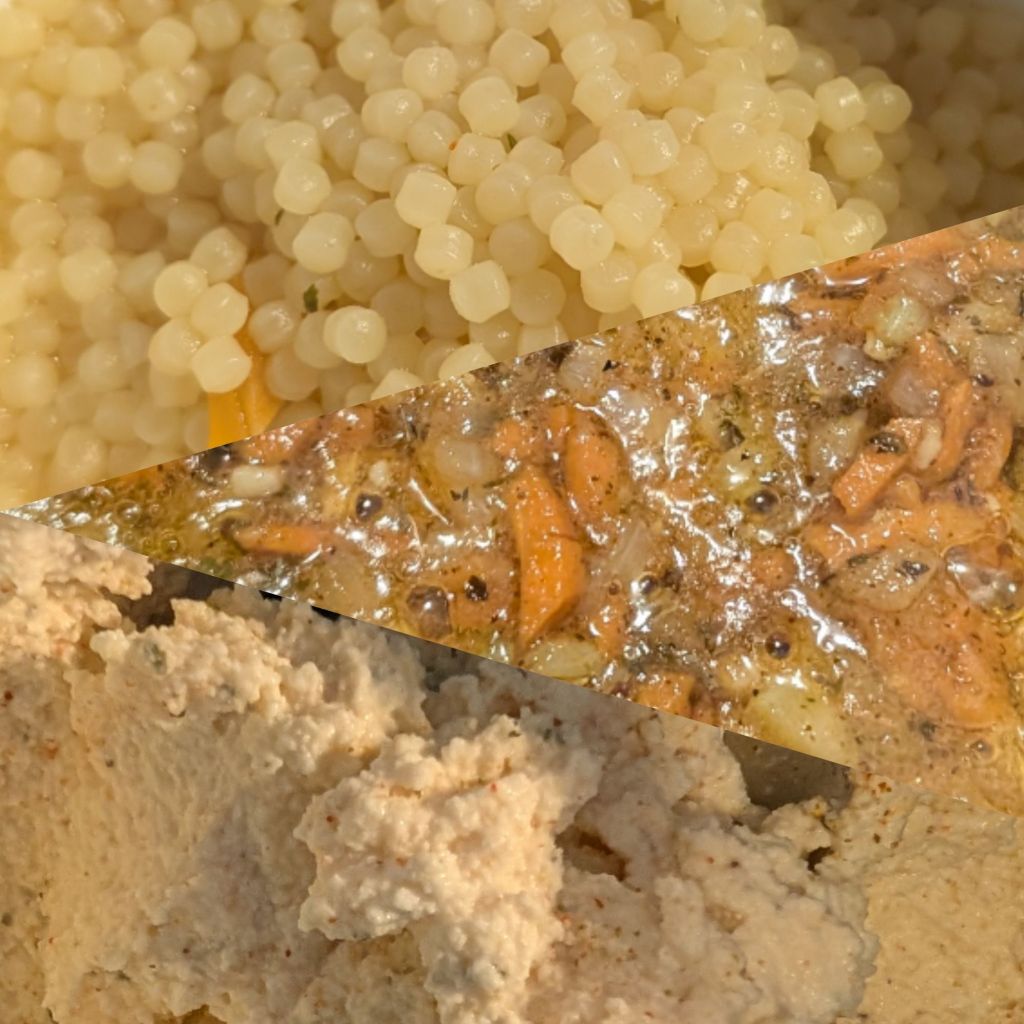
  2. In a soup pot, sauté the Carrots, celery, & onion in some butter & a splash of olive oil, with the jarred minced garlic. Season with a bit of the herb/spices to taste, add minced garlic after the stuff cooks a bit.
  3. Take out maybe ½ to ¾ cup of the mirepoix and set aside to cool.
  4. Add the chicken stock and beef bouillon cube to the pot with the remaining mirepoix, and bring it to a boil.
  5. Add the acini di pepe, cook about 9 minutes per the box, just shy of tender — you want it barely cooked, not swollen.
  6. Set aside about ½ to ¾ cup of the acini di pepe to cool.
  7. Put the stock on a warmer or a low simmer.
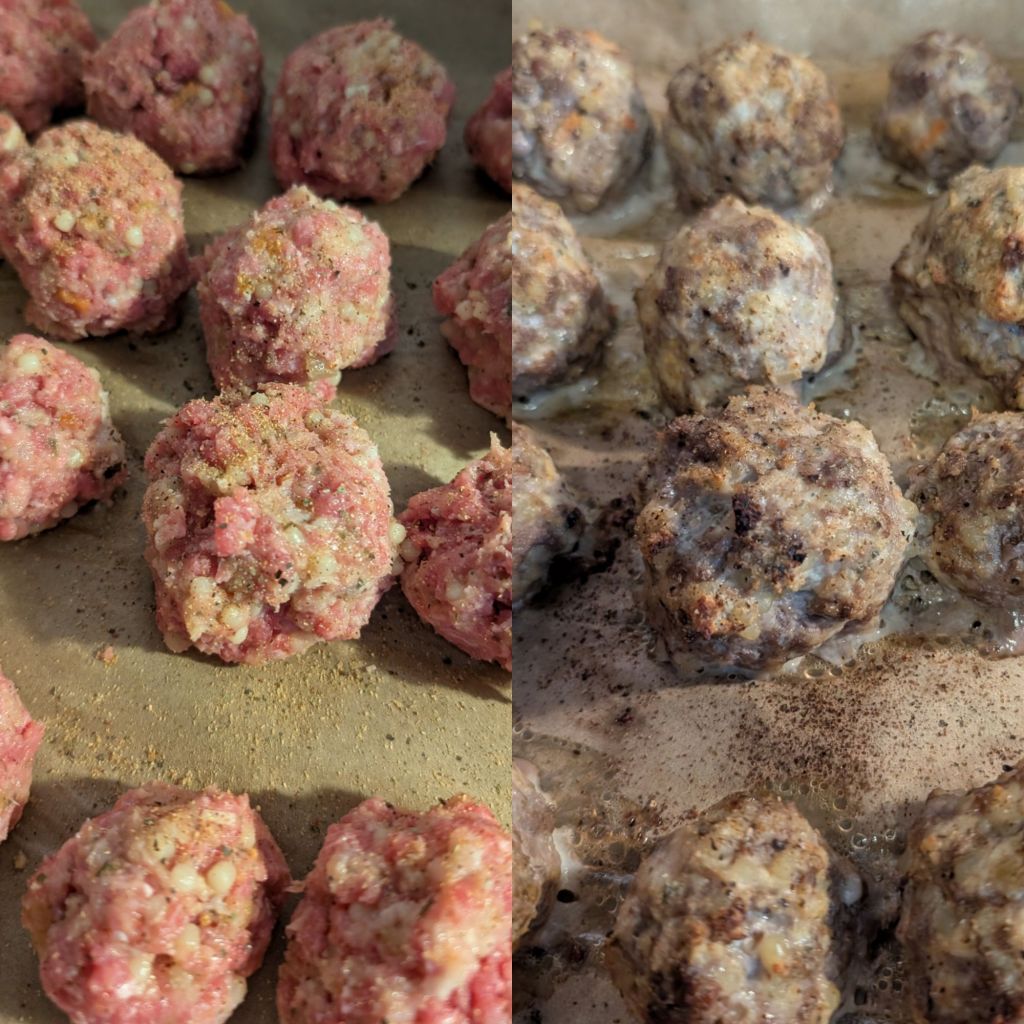
  8. Mix the meatballs! Combine ground beef, ground chicken, 2 large eggs, 2 tablespoons milk, plain & panko breadcrumbs, 0.5 cups grated Parmesan. Gently fold in the cooled mirepoix/acini di pepe mixture, Mix by hand until just combined, don’t overwork. Don’t forget to season the egg mixture, the breadcrumbs, & the meat.
  9. Form a bunch of meatballs on a backing sheet with some parchment paper. Mine were probably just a little smaller than 2 inches in diameter. I seasoned them after forming, too.
  10. Bake the meatballs at 400°F for 17-ish minutes (until they reach 165°F internal).
  11. Season the ricotta: While the meatballs bake, mix ricotta with a pinch of the seasoning blend until well combined.
  12. Wilt the spinach in a pan with some butter & seasonings.
  13. Split 4 hard rolls on top. Spread the herbed ricotta inside, then toast in the oven at 400°F for about 5 minutes. (You can time it to go in with the meatballs or wait until they’re done.)
  14. Layer wilted spinach into each toasted roll, top with meatballs, then sprinkle fontina & shredded Parmesan generously over the top.
  15. Melt the cheese: Return assembled subs to the oven at 400°F for about 7 minutes until the cheese is melted and bubbly.
  16. Warm the broth and serve alongside the subs for dipping, French dip style.

Notes:

  • I should have used fresh parsley in addition to the dried stuff.
  • Use “real” garlic if you’re cooler than me.
  • I should have put a tiny bit of spinach in the meatballs too.
  • This could have made like 10 sandwiches, I only made 4. We’re gonna freeze stuff for later.
  • Use plain or panko or seasoned breadcrumbs, or crush up crackers, parmesan Cheez⟐It, or croutons. Hell, crush up Ritz. Use what ya got.
  • Just melt butter with herbs/seasonings & spread it on the bun, then add mozzarella or provolone or whatever kind of cheese you like here if you’re so inclined. I went with Ricotta and Fontina because they seem more mellow for some reason.
  • I would use a little pasta here. Maybe orzo or stelline or any kind of pastina.
  • Of course you can use sausage, or veal, or pork, or whatever floats your boat.
  • The spinach could have used some type of vinegar maybe, to cut the richness? Lemon would work too, but I’m not a huge fan. We had these with a nice small side salad.
  • I feel like red bell pepper may not have been out of place here somewhere? In the meatball sauteed? Roasted red peppers on top?
  • I hate rice in meatballs, so I subbed in veggies for my cabbage rolls, and that really worked well.
So, there you have it. What do you think? Do you make a similar sub or know of a restaurant or food truck that does? What other kind of soup would make a good meatball sub? My wife suggested French onion. That seems doable and delicious.

What if we got weird with cheddar cheese-filled meatballs dipped in tomato soup? Broccoli cheddar soup inspired, made with meatballs sort of like ham loaf ? I suggested a meatloaf made like a green bean holiday casserole and the family told me that the madness had to stop. (It’s not that far off from mushroom meatloaf mayhem.)

Wait. Ground turkey, boxed stuffing as the breadcrumbs, and a cranberry glaze? That would make one hell of a meatball sub or a meatloaf. (Sort of like my Thanksgiving sliders?)

Maybe the meatball club can be more than just a sandwich, and more than just a photo on some merch? We could strive to make different meatball sandwiches, and have an actual club? Who’s in?

Hit me up in the comments with questions or suggestions!

What’s the non copyrighted or trademarked name for Beefaroni?


I’m gonna call it beefaroni anyway, because these names are just ridiculous:

The dish commonly sold as “Beefaroni” (a trademarked name owned by Conagra Brands) has several regional and generic names. Depending on where you are in the US, the most common non-trademarked names for this ground beef and macaroni tomato skillet are American Goulash, American Chop Suey, Slumgullion, or Johnny Marzetti. [1, 2, 3]

Right?

A white bowl full of homemade beefaroni - spiraling pasta with ground beef.
Boy are deez tasty.

At any rate, I was hungry for it… and I am not a fan of the Chef Boyardee stuff/ (Sorry, Chef!) We would have this occasionally when I was growing up, and it’s a comfort meal I guess. It’s easy enough, and safe for the beef part these days, pretty economical.

Below is how I do it. How do you do it, & what do you call it?

Stuff yinz need:

How to do it:

  1. Bring 4 quarts water to boil in a stock pot, ad the bouillon cubes, Italian blend, & Dash.
  2. Brown the ground beef in your skillet, hit it will all those spices… or whatever you got or like. We don’t measure here. Season until you think it’s too much, then keep going a little bit.
  3. Drop that Cavatappi or whatever pasta shape you dig into that water for 7 minutes or the recommended time on the box. Make sure you stir it up every once in a while.
  4. Drain the pasta, leave a lil’ bit of pasta water, return it to the warm yet off burner.
  5. Dump in the ground beef, the tomato soup, and stir like you practiced with the pasta.
  6. Put it in a bowl and eat it.

Notes?

  • Yeah, tomato soup! Not tomato sauce, pasta sauce, tomato paste, crushed tomatoes, or any of that for me. This is cheap.
  • Obviously if you would prefer any of that, do it.
  • Sauteed onions, diced tomatoes, some type of beans, or even bell peppers would probably be great in this.
  • This is a memory I’m not messing with though. I’m keeping it basic and cheap.

There you have it. I know it hit the spot for me.

A close-up photo of a pot containing delicious spiraling cavatappi pasta with ground beef covered in condensed tomato soup.  It's red and warm image overall.
Comfort Food / Struggle Meal

Pizza Pockets


So, a while back I made some things, and I don’t know if they were calzones or stromboli because no one can seem to fully agree on the definitions of either. Yes, I know definitions exist, but restaurants are all over out here calling them the wrong thing and people will confidently give you their contradicting hyper-regional opinions as gospel. Maybe it’s a turnover? I like alliteration, so Pizza Pocket it is.

[ Just The Recipe | Cooked Wiki | Only the Recipe ]

The first ones I made were not pretty. They were more half-moon shaped, one was not sealed well. They were delicious, but not awesome. I used pizza dough balls from Aldi and I did not do a great job stretching it.

This time I made some for lunch, and they looked pretty good. I put fillings in to order for each of us, and put our initials on top so they didn’t get mixed up. I got a resounding seal of approval on these, so I’m putting it here to make it again.

A top-down view of a parchment paper lined baking sheet holding four large, crispy, golden-brown pizza pockets. Each pocket features a personalized family initial carved into the top crust to identify the different fillings, with hints of glorious melted cheese peeking through.
Pizza Pockets!

Here’s what I used:

  • Giant Eagle pizza dough pop-tube
  • Jarred pizza sauce
  • Shredded Italian blend cheese
  • Shredded Mozzarella cheese
  • Parmesan cheese (the powdery shake kind)
  • 2 eggs
  • ½ stick butter
  • “Toppings:” (Fillings?)
    • canned mushroom stems & pieces
    • canned black olive slices
    • jarred roasted red peppers
    • diced ham
    • mini pepperoni
  • Spices:
    • garlic powder
    • onion powder
    • paprika
    • Italian blend
    • parsley
    • Dash table blend

Here’s how I made them:

  1. Preheat the oven to 400° (Or if you’re weird like me, preheat it to 425° then crank it down to 400° after you put the food in.)
  2. Put down some parchment paper on a large baking sheet because washing dishes sucks.
  3. Put any wet toppings like the mushrooms, olives, & red pepper on a paper towel or two do drain & dry off a bit.
  4. Melt the butter in a microwavable bowl, add in spices to taste.
  5. Crack the eggs into another bowl, whisk (or fork), and add spices again.
  6. Pop open the scary dough tubes with a spoon, roll them out, and cut them in half the short way.
  7. Put down the Italian cheese blend on half of the half. I didn’t measure, but I did use the whole bag. Leave room on the edges so you can seal the dough.
  8. Spoon on a very little bit of the pizza sauce.
  9. Add your preferred toppings, keeping track of who gets what. I took ’em all!
  10. Sprinkle some parmesan cheese.
  11. Top with a little bit of Mozzarella.
  12. Hit the edges with some egg wash.
  13. Fold over the dough to make a nice rectangle, and use a fork to crimp the 3 “open” edges.
  14. Brush the egg wash on top, then brush the melted butter on top of that.
  15. Add extra spices on top if you think it needs it, and go for more parmesan too.
  16. Cut slits in the top shaped like everyone’s initials so you know whose is whose.
  17. Pop that in the oven at 400° for 20 minutes and you get what I got in the picture.

Suggestions/Substitutions/Advice:

  • I measure with my heart. You should too. Trust your judgement. Season until your ancestors tell you to stop.
  • It’s also fun to make mountain pies (if you have a campfire going) or pizza grilled cheese.
  • You could get fancy and do all kinds of stuff like green peppers, pepperoncini, sausage, onion, Ricotta, anchovies, spinach, basil, whatever.
  • Of course use whatever dough or cheese fits your fancy, fits your budget, or is simply what’s available.
  • You can skip the pizza sauce. I also wouldn’t overdo it… you want vents up top to let steam out so it doesn’t stay too wet.

So, do you make something similar? I am way too impatient to make dough, and I seem to even be too impatient to stretch a dough ball properly. These rolled canned tube things were perfect.

Hit me up on the comments or social media replies with some conversation:

  • What would your toppings of choice be?
  • Is this a Calzone, Stromboli, turnover, or what?
  • What would you do different?

Regardless, when making a pizza, calzone, stromboli, you gotta listen to my Punk Rock Pizza Party playlist. Oh and, hey… Did you try and make a meatball club yet? You don’t have to do stuff the same boring way as everyone else. If you did make one, you should get a T-shirt (or at least a button).

I will continue to make weird stuff, and leave pizza to the experts. You could wear this T-shirt while you make pizza 0r eat pizza.

Onion Nooks & Swiss Crannies 🧅🧀


So, the other night, I caramelized some onions for some burgers. In my time-honored tradition of always making too much… I had some leftover. I had an idea for English muffins for breakfast topped with the onions & some Swiss cheese, so I tried it, out.

The were absolutely delicious. Just posting this so I can pin it & refer back to it.

When caramelizing the yellow onions in a ridiculous amount of butter, I added some salt, onion powder, garlic powder, paprika, ground mustard, & black pepper. I have no idea if this is “correct” but it was delicious. I start them out on medium until they’re translucent, then cook on medium-low for a ridiculously long time.

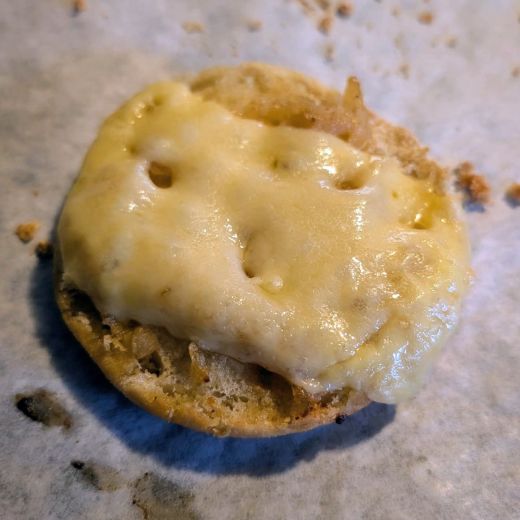
A close-up of a toasted English muffin topped with caramelized onions & melted Swiss cheese on a parchment paper background. 🍞🧈🧅🧀

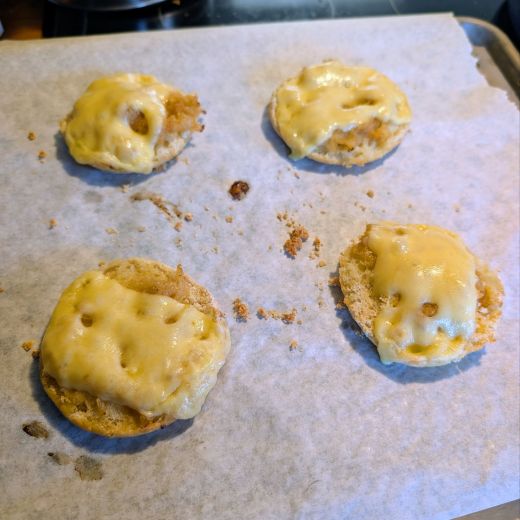
Fast forward to the next morning, I split some L’Oven Fresh English Muffins, spread butter on them, spread some of the leftover caramelized onions on them, and topped with half a slice of Swiss cheese… and baked in a pre-heated 350° F oven for about 13 minutes. (The onions were cold from the ‘fridge, & I wanted to be sure they were heated up before everything was too toasted.)

It was a great breakfast… but I did miss a beef broth or au jus kind of flavor. Would have been like French Onion English Muffins then. Maybe next time?

Four toasted English muffin halves topped with caramelized onions & melted Swiss cheese on a baking sheet lined with parchment paper.

What would you call this? Have you done something similar? Would you do it different? Ever try the oven method to caramelize onions, or something other than slow & low on the stovetop? Let me know in the comments!

Mushroom Meatloaf Mayhem


If you want beef, then bring the ruckus! My mushroom meatloaf ain’t nothin’ to ████ with.

With the likely chance of repeating myself, I like to make meatloaf different all the time. I make “normal” ones often, and made a crazy breakfast one one time. I think I have even crushed up Cheese⟐Its or Doritos in lieu of breadcrumbs. I blame Chopped. I forgot that I made one VERY similar to this not too long ago. The blog post was kind of sus as I was using LLM as I cooked to keep track of what I was did in hopes of having a coherent recipe for a post, & had 4 of them pop out interpretations of my recipe. I put the examples there. That may be overwhelming. I’ll do all the writing for this one. I sort of half-plan and wing it with meatloaf. This time I wanted to do some mashed potatoes & acorn squash with it too… so I did.

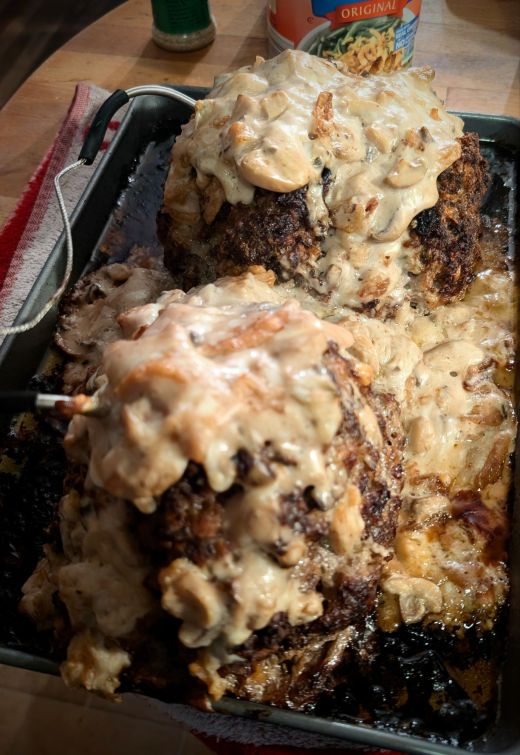
Two freshly baked meatloaves topped with cream of mushroom soup and crispy fried onions, resting on a sheet pan.
Mushroom Meatloaf Mayhem

This was an absurd amount of meatloaf, but I like leftovers and I’ll probably freeze some for later too. This is what I bought or had on hand this time. Most of my ingredients nowadays come from Aldi, & we do get some stuff at Giant Total Eagle.

I used a lot of processed ingredients, so I didn’t add any salt… other than what was in the season salt. I forget if we have McCormick or the Aldi brand. Of course you could use fresh mushrooms like I did last time… but this is what struck me to use this time. Also, you can use any kind of cheese or meat you want. If you don’t like, mushrooms, or onions… I will say “Bean Soup” to you and you can find other meatloaf recipes where they’re not the focus. If you don’t like meat… I would be interested to hear your suggestions for substitutions here.

You know… if I put shredded green beans in this, and maybe bacon pieces… it would be green bean casserole meatloaf. 🤯

Here are all the parts to the meal, and what I did to bring it all together at the same time…

The Mushroom Mayhem Meatloaf

Ingredients:

  • ½ stick unsalted butter (OK, maybe ¾)
  • A splash of EVOO.
  • A splash of milk.
  • ½ Spanish Onion
  • 1 cup French-fried onions.
  • 2 4-oz. cans of mushrooms
  • 2 10.5-oz. cans condensed cream of mushroom soup
  • 1½ cups panko breadcrumbs
  • 2 large eggs
  • 1 cup shredded Havarti cheese.
  • 2 tsp. jarred minced garlic (oh I know some of you hate it)
  • 4 lbs. ground beef (As it worked out I had exactly 4 lbs., 2.54 of 80/20 & 1.46 of 93/7.)
  • A1 (to taste)
  • Garlic Powder (to taste)
  • Onion Powder (to taste)
  • Seasoned Salt (like Morton’s Season All, Lawry’s, or Stonemill to taste)
  • Mrs. Dash’s Table Blend (to taste)
  • Black Pepper (to taste)
  • Ground Mustard (to taste)
  • Paprika (to taste)
  • 4 slices of cheap spongy white bread

Instructions:

  1. Preheat the oven to 375°.
  2. Drain & dice one can of mushrooms, dice the onion, and crunch up some of those french-fried onions to throw in there too.
  3. Hit the onion with garlic powder & onion powder.
  4. Melt some butter with a splash of EVOO on medium-high heat in a frying pan, then add the mushrooms & onions, sauté on medium-low for a while until the mushrooms are translucent & almost starting to caramelize. Toss in some of that minced garlic once it gets going. Set aside.
  5. Mix 1 can of the cream of mushroom soup, the breadcrumbs, about a ½ cup of the French fried onions, & 2 splashes of A1 in a bowl. (Would this count as a panade?)
  6. Whisk the eggs, the splash of milk, & all your spices in the bowl. Or use a fork. Be whimsical. Improvise.
  7. In a large mixing bowl, mix the ground beef, about ¾ of the sauteed mushrooms & onions, the sort-of panade, the egg mixture, about 1 cup of shredded Havarti, & another tsp. of that minced garlic. Mix it all up. (I started with a spoon spatula, then just used my hands.)
  8. Form the meatloaf into two loaves placed on top of the slices of white bread on a sheet pan. (You had that ready right? I mean, you read this all through before you started and knew you needed to have that ready before you got your hands all raw-meatloafy, right?)
  9. Sprinkle Seasoned Salt & whatever other spices you want on the top.
  10. Cover with foil, & put in the oven for about a ½ hour-ish? I cooked to temperature, not time. (The USDA says ground beef should hit 160° to prevent all kinds of potentially horrible things.)
  11. Mix together another can of condensed cream of mushroom soup, some more shredded Havarti, some French-fried onions, a small can of mushrooms, about half of what you have left of the sauteed onion/mushroom mix, & some A1 & spices.
  12. Open the oven, take the foil off, insert your thermometer probes, slather on the mixture, and slide it back in. Cook for about an additional hour. Maybe? (This is where I slid it to the side & popped in my golden acorn squash.)
  13. Take it out when it hits the 160°, let it rest for a bit, and have at it!

Notes:

  • I add whatever spices at each step as I go.
  • Of course, use fresh mushrooms or different onions, or whatever speaks to you.
  • Monitor your meatloaf, if cooling alone maybe do an hour covered, then uncover a bit, put in the probes, & slather the stuff on top later. I didn’t want to keep opening the oven.
  • I rarely measure when making stuff like this… these are suggestions at best.
  • I was originally going to make one long-ass loaf, but I decided on 2 smaller ones at the last minute. I should have put them side by side, not end to end.
  • Use a loaf pan or two if that’s your thing, or a glass baking dish, or whatever works for you. I like the freeform loaf on bread, it works for me. Just maybe don’t do feetloaf or faceloaf. Really, don’t do this.
  • I start with an empty dishwasher and just rinse & pop everything in there as I use it because I have a small kitchen.
  • You could rock out to Meatloaf while you make meatloaf. Or some Wu Tang.

Roasted Golden Acorn Squash

Ingredients:

  • 2 golden acorn squashes
  • 1 stick of butter
  • Paprika (to taste)
  • Onion Powder (to taste)
  • Brown Sugar (to taste)

Recipe:

  1. Your oven is already at 375° with the meatloaf above, right?
  2. Melt the butter, spices, & sugar in a microwave safe bowl.
  3. Cut the acorn squash in half with a sharp serrated knife from the stem to the tip on both sides, then pop it open.
  4. Scoop out the seeds & strings with a spoon.
  5. Score the insides with a cross-hatch pattern or whatever floats your boat.
  6. Put the 4 halves open side up in a glass baking dish in about ¼ of water.
  7. Try to evenly distribute the sugary melted butter in the centers, being sure to drizzle some on the top too. I used a small gravy ladle.
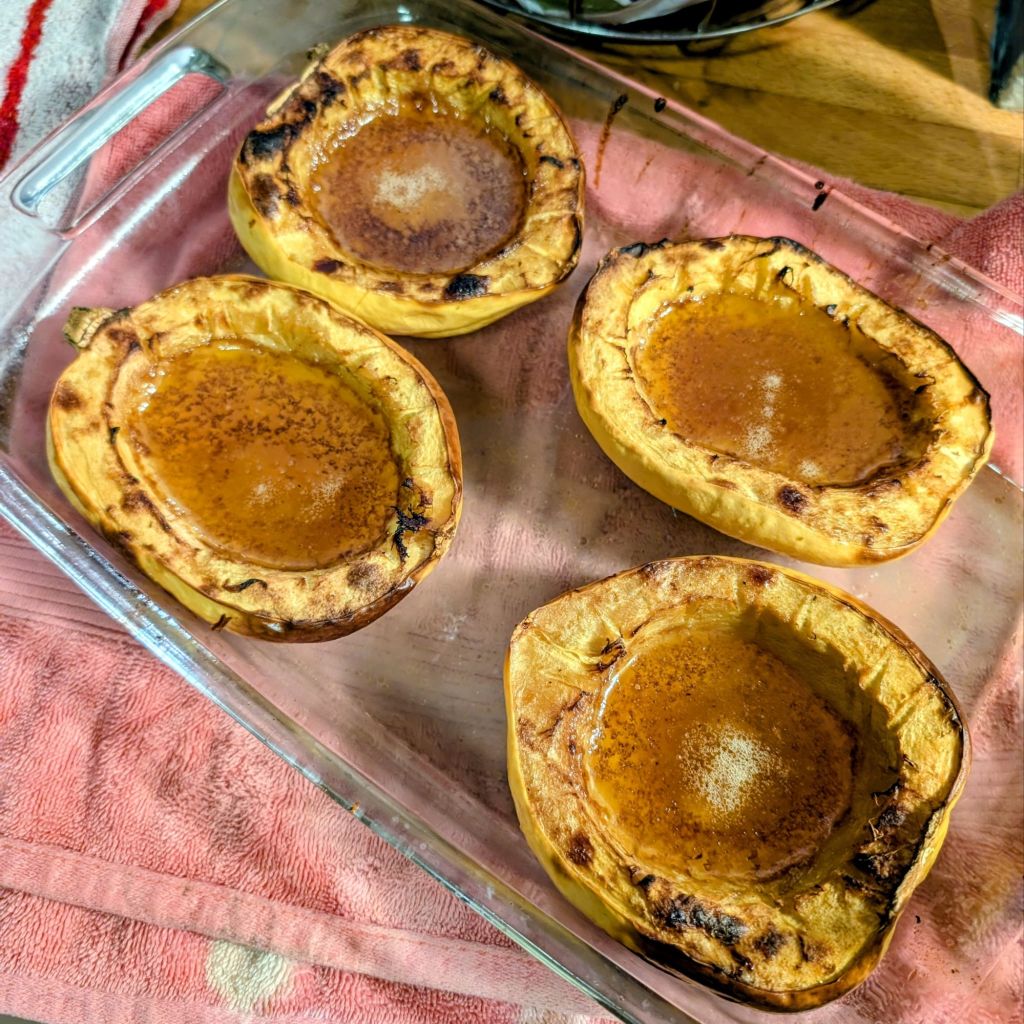
  8. Let it ride in the oven for about an hour or so, maybe an hour and 15 minutes. You want it to just slightly start to burn on the edges.

Notes:

  • If I was not sharing the oven with meatloaf, I probably would have put these in at 400° or 425°. I am here to tell you that recipes are merely suggestions and you are free to adapt on the fly and use your own free will.
  • Lots of recipes have you start acorn squash face down, then turn them over, do the hokey pokey & all that. I am here to tell you that you absolutely do not need to do all that. Save your time & energy for other meal prep or solving one of my mazes.
  • Use whatever spices or sweetener you like. I find maple syrup overpowering sometimes, but it is popular here. I actually in hindsight should have tried hot honey on one. It seems to be all the rage. Some cayenne would really work well here.
  • Instead of a cross-hatch pattern, you could make a face, carve a list of your enemies, or this.
  • Squashes sounds weird. Can squash itself be plural?

Nashed Tapaters N’ Gravy

This may be controversial. I like boxed instant mashed potatoes. They’re quick. I can control the consistency easily. They are a blank canvas upon which you can paint your flavorful dreams. On holidays? I am doing real potatoes. Typical dinner? Flakes are fine.

Mashed Potato Ingredients:

  • Boxed Mashed Potato Flakes
  • Milk
  • Butter
  • Beef Bouillon Cube
  • Shredded Havarti
  • Black Pepper (to taste)
  • White Pepper (to taste)
  • Mrs. Dash’s Table Blend (to taste)
  • Garlic Powder (to taste)
  • Onion Powder (to taste)

Mashed Potato “Recipe”:

  1. Make the potatoes according to the directions on the box. Their suggested serving sizes are a lie. Go big, or go home.
  2. I pop a beef bouillon cube or two in the water instead of the salt. It ties it in to the meatloaf nicely and adds salt & flavor.
  3. Stir in some shredded Havarti cheese at the end. Measure with your heart. Or your appendix. Whatever organ is speaking, just listen.
  4. Add some more butter.

Gravy Ingredients:

  • 1 brown gravy packet
  • 1 mushroom gravy packet
  • 1 4-oz. can of mushrooms
  • 1 10.5-oz. can condensed cream of mushroom soup
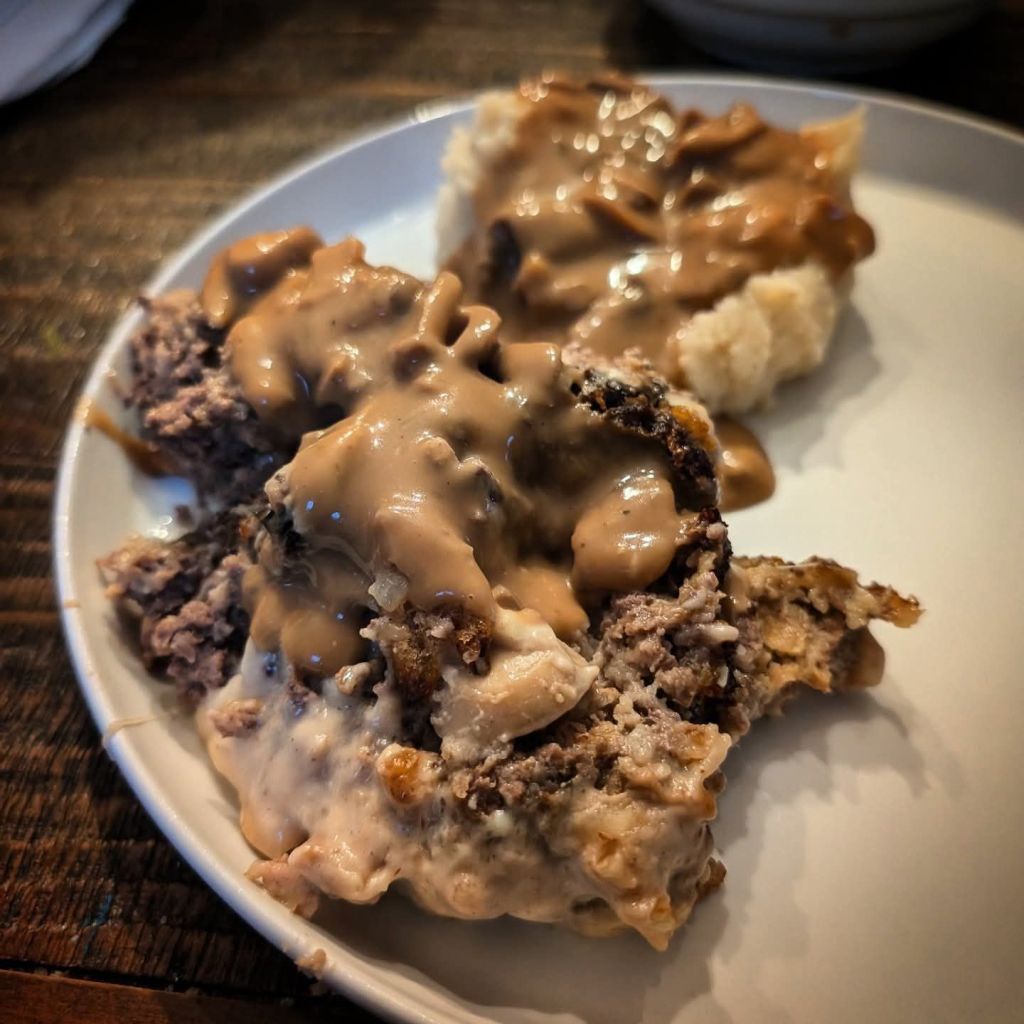
  • Some of those sauteed mushrooms & onions from waaay back up top
  • Black Pepper (to taste)
  • White Pepper (to taste)
  • Mrs. Dash’s Table Blend (to taste)
  • Garlic Powder (to taste)
  • Onion Powder (to taste)

Gravy “Recipe”:

  1. Mix the gravy packets both at once according to the directions on the pack… adding in your preferred spices.
  2. Once it is fully simmered & not clunky… pop the burner back up to medium and add in the soup, the canned mushrooms, and some of your sauteed onion & mushroom mix.
  3. Keep that going until it’s all heated through, you shouldn’t need to let it boil again. Let it rest a bit.

Notes:

  • I’m an anarchist when it comes to instant potatoes. Toss in buttermilk, sour cream, cheese, garlic… whatever you want. Use chicken stock or vegetable stock instead of water. I try to tie it in to the main dish.
  • You could make a gravy from scratch… but it’ll be almost the same stuff that’s in the packets. And, I wasn’t about to collect the drippings from the meatloaf to make a gravy like you would with a roast. 🤣

🍖🍄🧅🧀🥔

There you have it. What would you do differently? Have anything you picked up that you might try? What are your meatloaf go-to recipes, tips, & tricks? Have any other meatloaf styles, or do you do it straight-up old school ketchup glaze? Most importantly, what are you rocking out to as you make meatloaf?

Zucchini Two Ways


Like everyone who has a vegetable garden, or even just one potted plant, we have an abundance of zucchini. I was asking AI language models for casserole cooking times & temperatures based on what I had around & could easily grab from the store, and I sort of picked a hybrid of all of them. I used ChatGPT, Gemini, Perplexity, & CoPilot. Originally I had been asking about zucchini bread recipes, then asked about the casserole. It is interesting to bounce ideas off of them.

Zucchini Casserole & Pizza-ish Zucchini Things on a white plate.
“Zucchini!” (But, say it like a Jawa yelling “Utini!” in Star Wars.)

I had the idea for the lil’ zucchini things last time I made breaded zucchini & ran out of breadcrumbs before zucchini.

Zucchini Ditalini Chickpea Chikini

I hesitate to call this a casserole, because the kids are on a brainrot social media kick where they have been informed somehow that Crock⬩Pot meals & casseroles are bad. The best part is they both ate & loved it… one even went back for more. It was a hit with the wife too, and I’d eat it again.

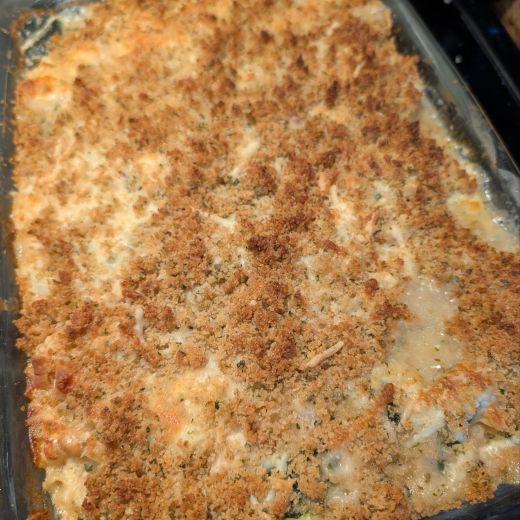
Zucchini Ditalini Chickpea Chikini - the top of a casserole dish just out of the oven, with a nice brown crispy breadcrumb topping over gooey melted cheese.
Zucchini Ditalini Chickpea Chikini

I felt like making a casserole, but not making a mess by pre-cooking/par-cooking or measuring anything. So… I ended up making two 9″x13″ casseroles. Here it is to the best of my memory.

The ingredients:

  • 1 ridiculously large zucchini from the garden.
  • 1 Spanish onion
  • 1 orange bell pepper
  • 1 pack (1½ lbs.) of chicken breasts
  • 2 large eggs
  • 1 (16 oz./1 lb.) box of Ditalini pasta
  • 1 (15.5 oz.) can of garbanzo beans
  • 2 (8 oz.) blocks of cream cheese, softened (Leave it out for a bit, nuke it, or cradle it in your armpits.)
  • 1 (2 cup) bag of shredded white cheddar cheese
  • 1 (2 cup) bag of Havarti cheese
  • 1 (1½ cup) bag of Gouda cheese (Same damn size bag – thanks, shrinkflation!)
  • 1 (32 oz./4 cups) box of chicken stock
  • 1 stick (4 oz./½ cup) butter.
  • Breadcrumbs – Maybe 3 cups?
  • 2 Tbsp. minced garlic from a jar because elicits unwarranted hate.
  • Seasonings to taste – I used Rotisserie Chicken seasoning, Mrs. Dash’s Table Blend, Black Pepper, White Pepper, Onion Powder, Garlic Powder, Paprika, & dried parsley. Ain’t nobody measuring all that.

I was going to include some “bacon pieces,” but I must have left them in the store, or they fell out in the car, or I put them in a weird place or threw them out, because they absolutely are in what may as well be a pocket dimension.

The Method:

  1. Pre-heat the oven to 375°
  2. Grease apparently two 9″x13″ glass baking dishes with a stick of butter.
  3. Get two mixing bowls. In one, whisk the egg, then fold in the cream cheese, the chicken stock, the garlic, the (drained) chickpeas, about half of each of the shredded cheeses, the dry Ditalini, and spices in one mixing bowl.
  4. Slice up the bell pepper, onion, zucchini, & chicken in consistently sized cubes. (If you left the zucchini in the garden too long like I did, cut out the spongy center.) Put all that in the other mixing bowl, toss it with some more of all the spices.
  5. Mix the contents of the two bowls together as you string together new swear words and wish you have an even more ridiculously larger mixing bowl.
  6. Put those into the baking dishes. Or one big one, or a casserole dish, or whatever you’ve got. Cover with foil, place in oven, & bake for 45 min.
  7. Melt the remainder of the stick of butter in a microwave safe bowl. Or a microwave unsafe bowl if you’re an agent of chaos. Dump in some breadcrumbs and toss them in the butter, so the breadcrumbs are coated but not all gross. I used a mix of panko & regular. I did not measure.
  8. Pull from the oven, but leave it on, remove foil.
  9. Spread the remaining shredded cheese on the top of the casseroles, then the buttery breadcrumbs… and put it back in the oven. I swapped it to 350° on a convection setting at this point for 15 minutes… but you do you.

Notes:

  • YOU DO NOT NEED TO PRE-COOK THE CHICKEN, PASTA, OR VEGETABLES. You certainly can, and it may deepen the flavors and reduce baking time, but I wanted to do this all in one go. I checked the chicken in a few sports with an instant-read and it was a bit over the USDA recommended 165°.
  • I was going to mix the cheeses together at the end, but why dirty another bowl? I dumped them on almost somewhat evenly.
  • Obviously, cut out what you don’t like, add what you do, skip stuff, or add stuff.
  • I may try this again with bacon or ham… but there was a good bit of salt in all the cheeses already, and probably the chickpeas.
  • I may try this with shredded zucchini and maybe leaving the chicken breast cutlets whole on top. Maybe.
  • Ricotta instead of cream cheese may be good too.
  • Use chicken broth, bone broth, vegetable broth, milk, water, or whatever… just give the pasta enough liquid to absorb.

Pizzucchini Teeny Mini

Again, this was a quick idea I had last tame I made air-fried breaded zucchini and ran out of bread crumbs because the zucchini multiplies as I sliced it. I did it in the oven quick after I yanked out the “let’s not call this casserole a casserole.”

Melted cheese, some toasted breadcrumbs, & pizza sauce over a round slice of zucchini.
Pizzuchini Teeny Mini

Ingredients:

  • 1 normal-sized zucchini.
  • 1 (2 cup) bag of “pizza cheese”
  • 1 (15 oz.) squeeze bottle of pizza sauce
  • a bit of EVOO
  • Maybe ½ cup of breadcrumbs

The Method:

  1. Do you really need instructions here? I put the oven on 400° on the air-fryer setting. I didn’t pre-heat it because it was already running.
  2. I sliced the zucchini about ¼-inch thick, and put it on the baking sheet over a bit of EVOO.
  3. I dropped on some sauce, some cheese, and a tiny bit of breadcrumbs.
  4. I put it the oven for 15 minutes.

Notes:

  • What the hell is “pizza cheese?” It said that on the bag. I guess mozzarella & provolone? Please tell me in the comments that it is all plastic & slowly killing me. Maybe I should have read the bag.
  • I will probably skip the EVOO or get a cooking rack for the air fryer setting.

~🧀~

OK, so that’s it. Hit me up with suggestions, questions, love, or hate in the comments! Share your zucchini recipes, too!

French-Dip Sandwiches & Smashed Potatoes


I made these the other night, and they were good! Here’s a quick & dirty method more than a recipe…

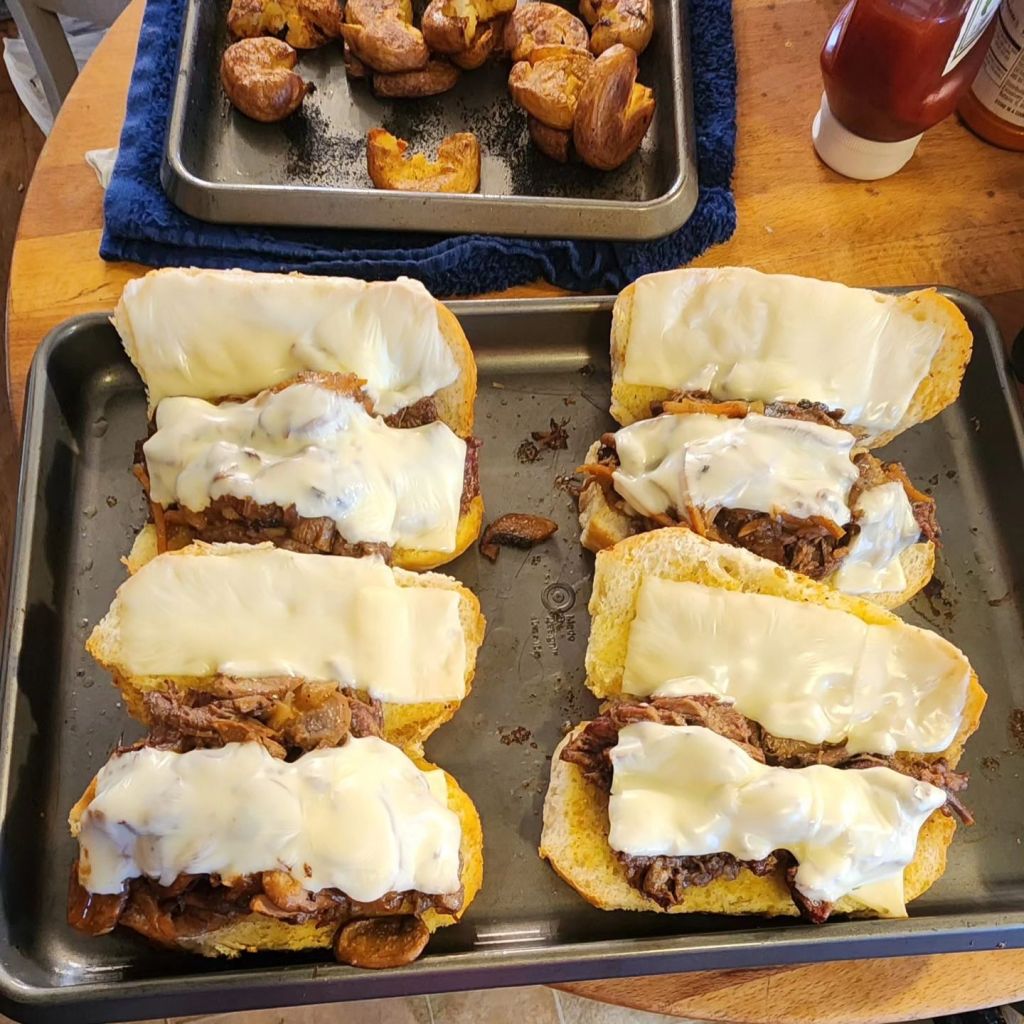
A French Dip sandwich with some Au Jus and smashed potatoes.

~🍽️~

For the French dip above, I just sautéed a diced sweet onion and canned mushrooms in medium heat in butter, set the goods aside, cranked the heat, seared a roast from Aldi in the same pan, added it, the onions/mushrooms, some shredded carrots, & a can of condensed French Onion Soup to the crock pot on high for 4 hours.

I pulled the roast out to “rest” for a bit before slicing, then put it back into a bowl with some of the liquid for the crock pot

For the buns, I just bought Mancini sausage rolls, melted butter in the microwave, put them in at 375° for 2 minutes, then pulled them out.

Then I piled on the sliced/shredded beef & mushrooms/onions/carrots and some sliced white American cheese, then back in the 375° oven for 5 minutes.

I made an “Au Jus” McCormick packet, and added some of the liquid from the crock pot for dipping. Toasting the buns really helped it stand up to the dip so it didn’t fall apart.

The potatoes were just little Yukon gold potatoes boiled in salty water for 30 min., smashed on to an oil-brushed cooking sheet, then baked at 425° for ½ hour.

I spiced the onions, meat, butter, & potatoes throughout all the stops, I think I added chicken bullion to the potato water, too. I used a lot of garlic & onion powder, black pepper, and Season Salt or Mrs. Dash’s table blend.

Well that’s it. Do you make anything similar? Have some tips & tricks? I have made similar stuff before with Swiss or Havarti or Provolone, used all kinds of different beef or even Steak-Ums, whatever buns/bread look good, used the French’s fried onions, etc. Ya gotta change it up and/or use what you have on hand!

Stuffed Cabbage Recipe


So, recently I was hungry for stuffed cabbage. I had never made it before, so after Googling a few recipes and soliciting advice from a Facebook food group and Nextdoor, I came up with my own. You can put this URL into Just The Recipe or do the Cooked Wiki “hack” to skip all my bullshit up here.

I’m not a huge fan of rice in meatballs like you typically see with stuffed peppers or stuffed cabbage, so I was googling recipes without it and kept finding stuffed tagged as “keto,” or with other grains substituted in. I think it’s a texture thing for me, so I opted to go my own route. Also, get out of here with your sweet/hot sausage, I’ll add my own spices. Keep your veal/beef/pork mixes. Maybe ground turkey would be cool. Keep the lamb away.

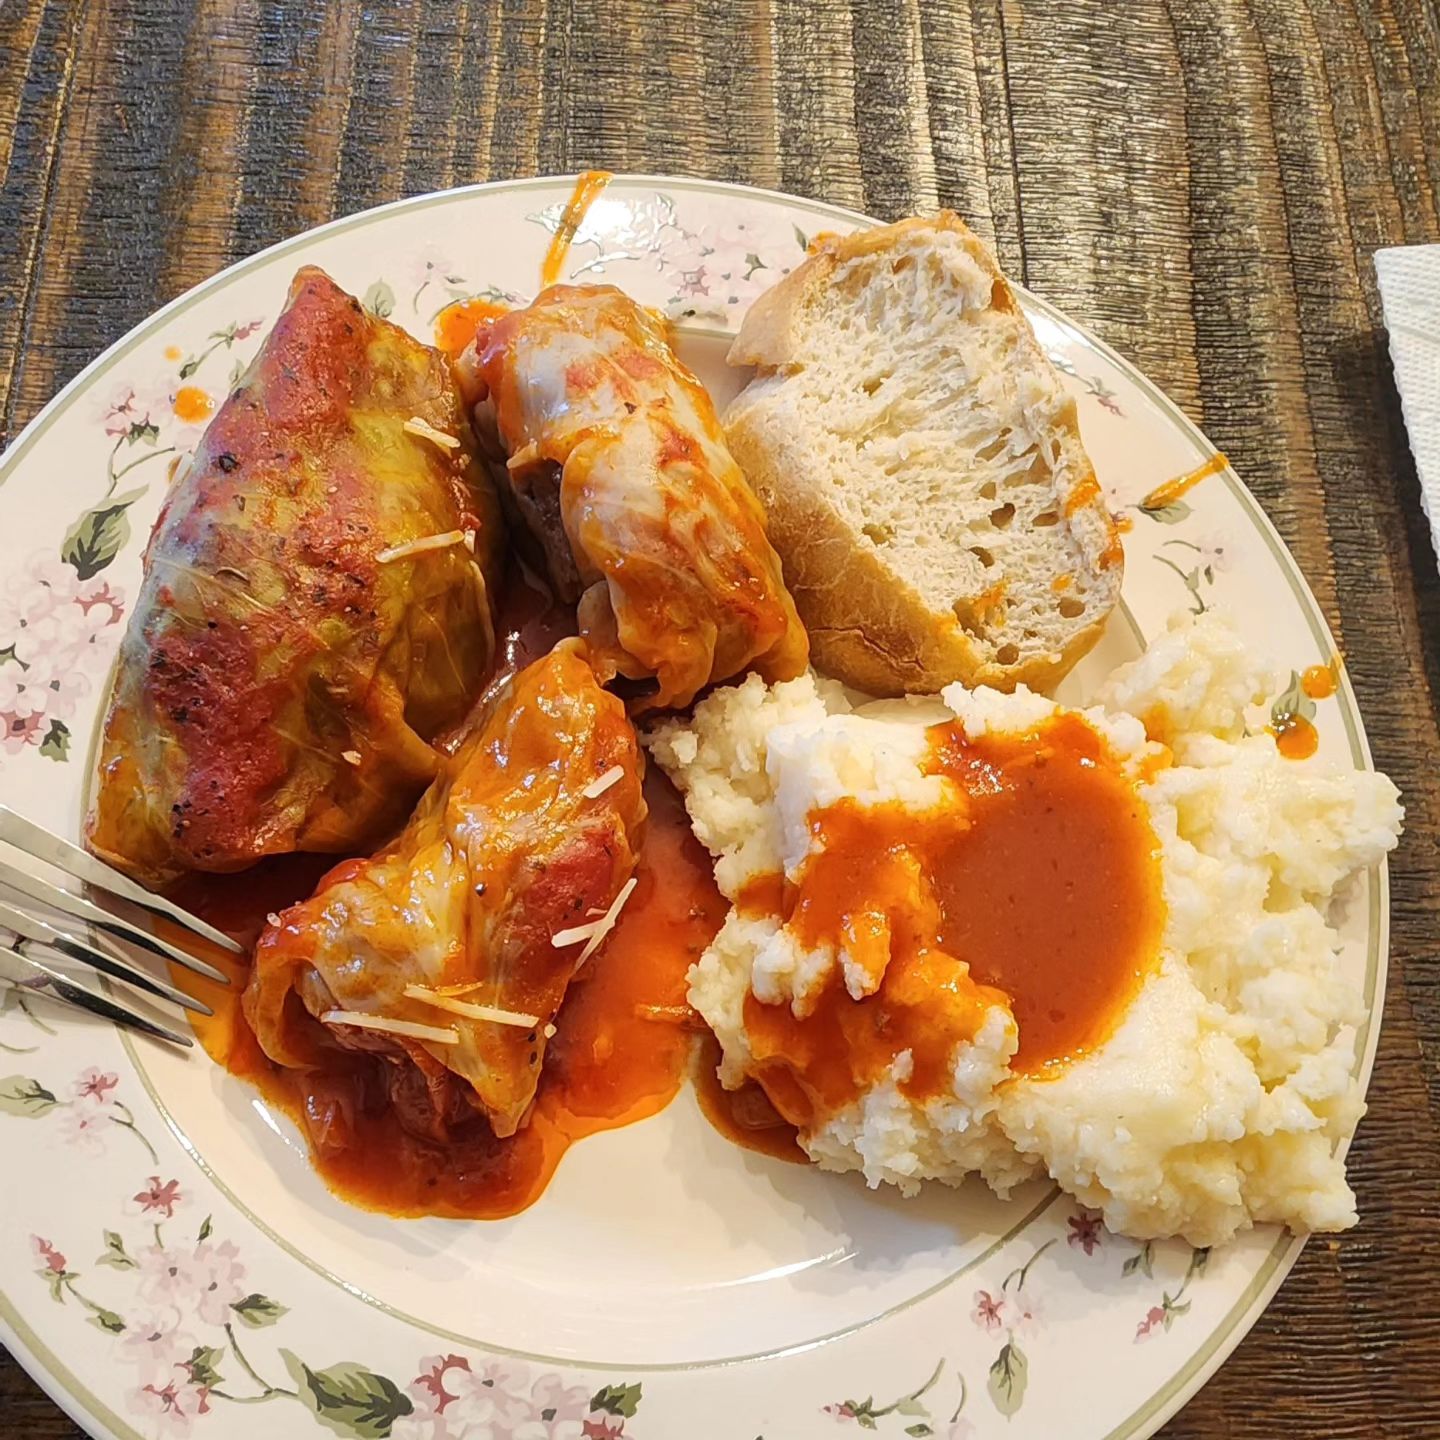
It seems that many are tied to their family’s traditional way of making it, and that’s pretty cool. I always thought of it as an Eastern European type dish, but lots of cultures have their own spin & own words for it according to Wikipedia. The thought of omitting rice, or using condensed tomato soup instead of a tomato sauce or V8 sent some people into a tizzy. I even learned that lots of people include sauerkraut, and some people like it served with sour cream. Some people make it like a casserole. We always had the tomato soup version growing up, so that’s what I like/expected. Who knew? I’ll probably make it different next time… but both kids & the wife liked it, so I won’t experiment too much.

I used glass baking dishes covered with foil, but got advice that a roasting pan, an electric roaster, the crock pot, a Dutch oven, a soup pot on the stove, or a pressure cooker all work well, too.

Although, I would like to wrap a piece of bacon around the rolls and throw them on the smoker…

At any rate, check out the recipe, and give me your recipes. tips, tricks, advice, and heavily guarded family recipe secrets in the comments.

Also – What do you call them?

Here’s what I did. 🤷

Get It:

  • 1 head of cabbage.
  • 4-ish lbs. of ground beef. (I used 3 lbs of 8/20 & 1 lb. of 90/10)
  • 2 eggs
  • ½ Yellow Bell Pepper
  • ½ Spanish Onion
  • 1 cup shredded carrots (I bought a bag and I’ll use it for other stuff too.)
  • 1 beef bullion cube
  • 1 stick of butter
  • 3 23.2 oz. cans condensed Tomato Soup
  • Bread crumbs (Do I look like I measure stuff? Probably a cup and a half?)
  • Shredded Parmesan Cheese (in the ‘lil fancy container by the expensive cheese)
  • Minced Garlic (just have the jar ready I’m lazy and don’t crush/mince my own)
  • Spices. I used salt, black pepper, white pepper, onion powder, garlic powder, Season All, & Table Blend. (I just throw it on at every step indiscriminately with complete abandon and total anarchy.)

Do it:

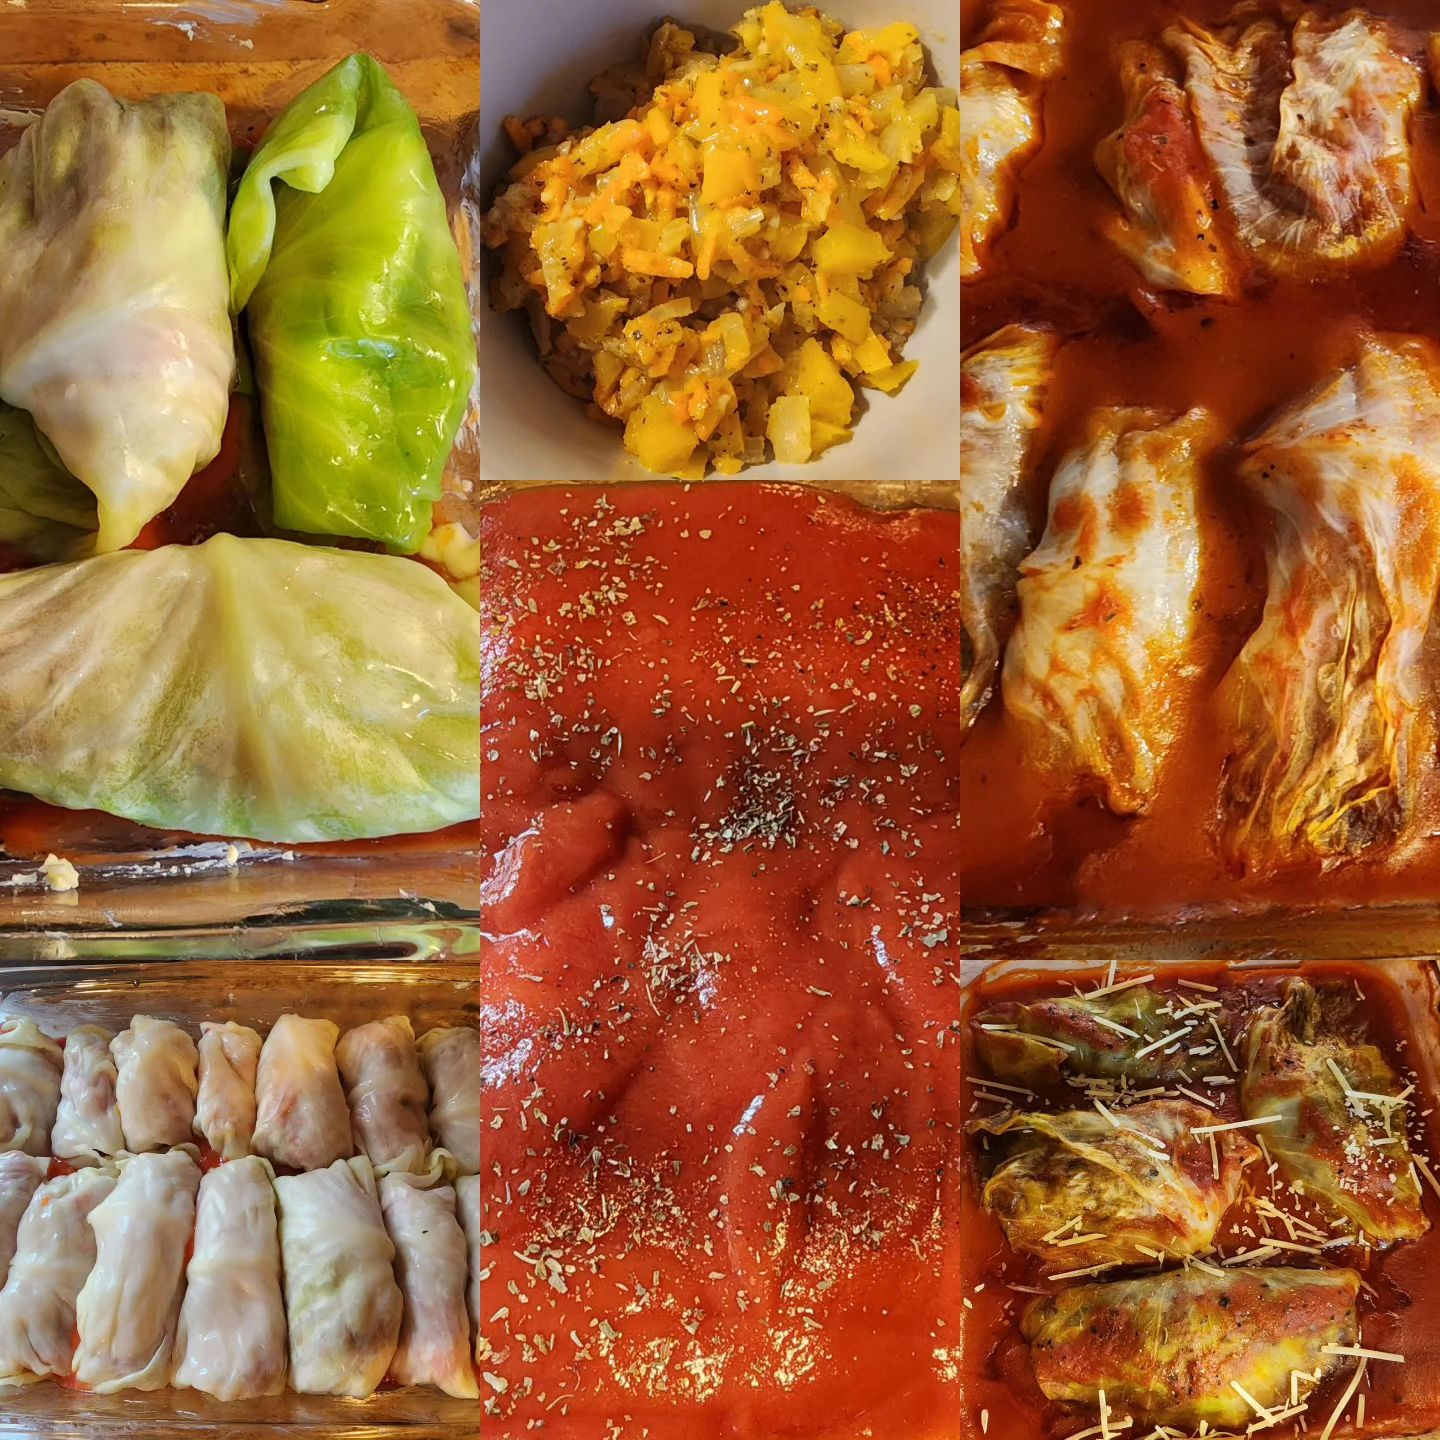
  1. Preheat Your oven to 400°.
  2. Get a stock pot, fill it enough to cover your cabbage. Drop in the bullion cube, and salt, minced garlic, and whatever seasoning your heart desires, and crank it to high with the lid on.
  3. Chop your onion in half. Toss half in the boiling water, but take the lid off first & then put it back on.
  4. Mince the rest of the onion.
  5. Cut up the yellow pepper. Feed half to your kids, the dog, or your significant other. Or just eat it. That’s the perk of being the cook. Mince the other half.
  6. Pull out a handful of the minced carrots, a big knife, and what them up until they are tiny pieces of shredded carrots. Our dog loves carrots, so I sprinkled some on her food bowl.
  7. I greased 3 glass baking dishes with the stick of butter. I used a 9″x13″, an 8″x9″, & a 9″x9″ because that’s what I had. I swear we broke like 3 glass dishes last summer.
  8. Melt what can surely be described as an obscene amount of butter in a skillet and sauté the onion, then the pepper & carrots on medium heat. I was sure to hit them with onion powder, garlic powder, salt, & pepper. I like to cook onions slow & low.
  9. Drop the head of cabbage in your now boiling water while you’re doing all that. Yes, remove but do not replace the lid.
  10. Put the sautéed veggies aside and let them cool a bit while you get the meat mixture ready.
  11. Set up a colander or strainer over a large bowl, & get your tongs ready.
  12. Beat your eggs, & add spices.
  13. Mix the meat, eggs, breadcrumbs, some cheese, sautéed veggies, some minced garlic, and lots of spices. I do it by hand. I wash my hands very well before & after, so you probably should too. But hey, you do you.
  14. By this time, hopefully your cabbage has been boiling 10-ish minutes. Use tongs to gently peel one leaf at a time and place it lovingly in your colander. Don’t go too quick with it and splash/burn yourself, because I would definitely never ever do that.
  15. Open the cans of tomato soup and cover the bottom of your baking dishes.
  16. Get the leaf, cut out the bottom tough part of the leaf rib if so inclined, slap in your meat mixture, and wrap it like a burrito – folding in the ends part way through. I didn’t measure, I eyeballed the meat to leaf ratio.
  17. Fill the baking dish(es), pour on & season the rest of the condensed tomato soup, sprinkle on some more parmesan cheese, cover in foil, and bake for an hour.

Tips/Lessons Learned/Parting Thoughts:

  • I was going to bake it at 375° and I probably should have, taking the foil off for the last 15 min. They were well over the recommended 160° internal temp for ground beef. Maybe some browning/caramelizing would not be a bad thing?
  • I saw a lot of tips for freezing the cabbage instead of boiling it, but I also read just as many responses saying that it can drastically affect the texture and not in a good way.
  • I may put in back next time. Maybe inside? Maybe wrapped outside?
  • Hear me out… Reuben cabbage rolls. Corned beef? Sauerkraut? Thousand Island or Russian dressing? Rye breadcrumbs? (We make non-traditional stuffed peppers sometimes, too.)
  • If you like rice, by all means include it. Or barley, or any other grain. I considered those tiny lil’ pasta balls… but maybe I just like to say Acini de Pepe way too much. Some people recommended cauliflower rice, also.
  • Check out all my other recipes and let me know what you think!
  • I got some thoughts from more tips & feedback when I posted photos on the FB food group & Nextdoor, too.
  • Are you still reading? Check out the recipe, and give me your recipes. tips, tricks, advice, and heavily guarded family recipe secrets in the comments.

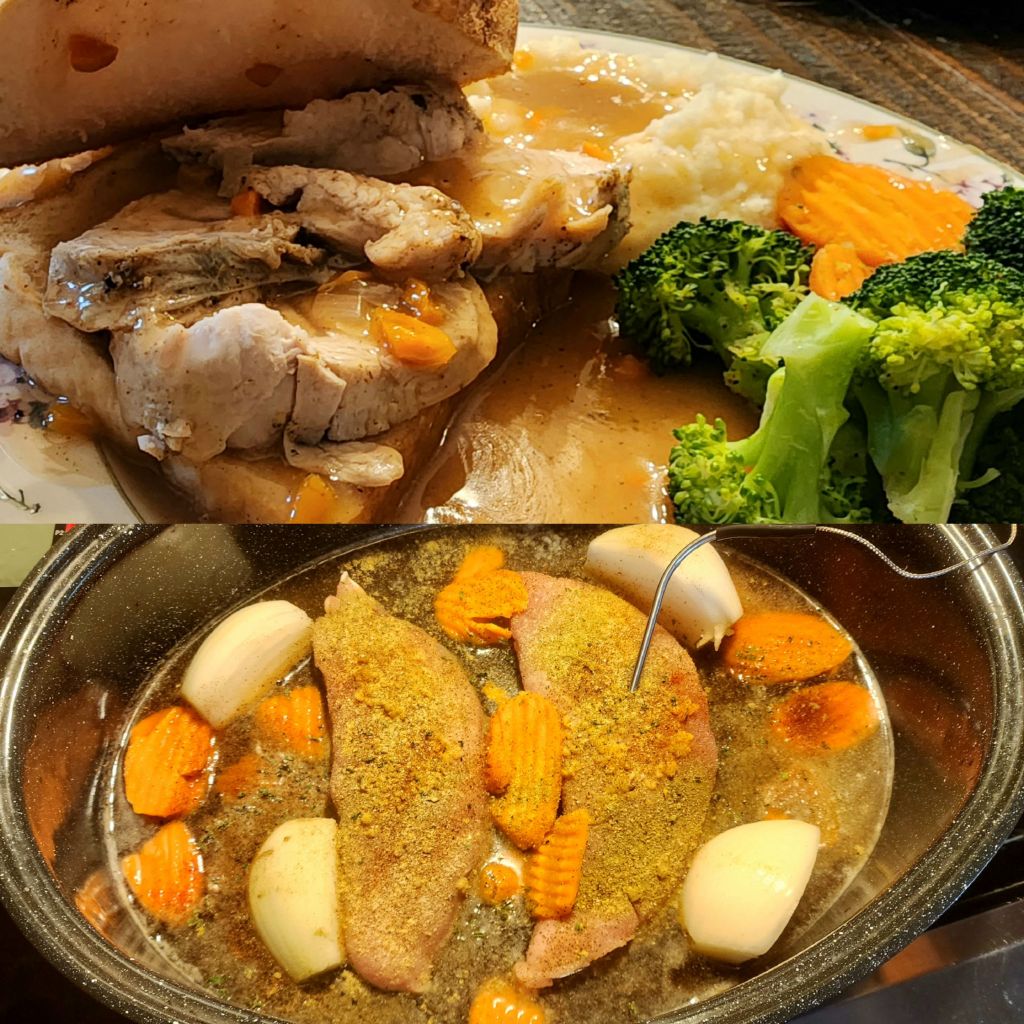
Hot Turkey Sandwich Dinner (Quick Style!) 🦃


I love a good hot sandwich smothered in gravy, be it roast beef, meatloaf, or turkey. I was in the mood for a turkey one like you’d get at a diner, and being a week night after work, wanted to put it together pretty quickly as I hadn’t thought ahead to use the crock pot.


Putting it here, so if I want it again I’ll remember what I did right & want to try it again. I may have to double the recipe when the kids are home. This fed two of us & left enough for me for lunch.

The Turkey:

  • 2 Breast Cutlets
  • 1 can of Yuengling Traditional Lager (Or Straub Amber, or Shiner Bock, or Smithwick’s, or Killian’s Irish Red. Pick a good beer.)
  • ⅔ cup carrot chips. (Yup, cheated & bought those in a bag too.)
  • 1 Spanish Onion, peeled & quartered.
  • 2 tsp. of minced garlic from a jar like a lazy person.
  • A bunch of your preferred spices. (I used, cracked pepper, poultry seasoning, sage, thyme, onion powder, garlic powder, paprika, Mrs. Dash’s table blend, and a bit of Season All.)
  1. Pre-heat the oven to 350°
  2. Put the turkey cutlets in a roasting pan, & pour the beer over them. Again, get good beer. No one wants you to cook with Coors or Budweiser or Mic Ultra.
  3. Toss in the onion & carrot.
  4. Add all the spices. When you think it’s too much, keep going.
  5. Stick in your meat thermometer probe that reads temperature while cooking.
  6. Pit the lid on, put it in the oven.
  7. I set the timer for 50 minutes, but it was done in a half hour or so. Cook to 165° internal temp & let it rest. I got distracted & took it to 170° and no one died, so don’t worry if it’s not precise.

The Veggies:

  • Bundle of Broccoli
  • Carrots from that bag you already opened.
  • Chicken Bullion Cube.
  • You still have those spices out, right?
  1. Eyeball some water into the pot, ad the bullion & spices.
  2. Chop that broccoli up and compost the stems or make those little fried things that looks delicious.
  3. Put the broccoli & carrots in the steamer thing that goes on top of the pot.
  4. Boil it for… I dunno. Not long. I like my broccoli bright green & crunchy. Bonus with the carrots being cut like this, they cook quickly too.

The ‘Taters:

  • They’re from a box. Follow the directions… sort of. I bought the store brand.
  • Use more butter than they call for.
  • Put a chicken bullion cube in the water instead of salt.
  • instead of lowfat milk, use ½ whole milk and ½ buttermilk. Add sour cream if you’re into complete and total anarchy.

The Gravy:

  • 2 jars of turkey gravy
  • roasting pan drippings
  • A bit of those carrots & onions.
  1. Heat the gravy on medium-high.
  2. Add pan drippings to taste
  3. Chop up the carrots & onions pretty small, & add them too.
  4. Cook it on medium until it thickens back up.

The Sandwich:

  • Texas Toast (Why do they call it that? it wasn’t toasted.)
  • That turkey, sliced after it has rested a bit.
  • That gravy.
  1. Put the bread on the plate, with some mashed potatoes beside it.
  2. Put the turkey on top.
  3. Add some gravy on top of everything.
  4. Put another piece of bread on the top. (Unless you want an open-faced sandwich.)
  5. Slather more gravy on that.
  6. Drink a shot of gravy.

Don’t forget to eat your vegetables so it’s a healthy meal. This is a quick week night dinner that tastes like it cooked all day.

Things I might try next time…

  • Toast the Texas Toast, or grill it up like grilled cheese or a patty melt?
  • Bacon pieces in the gravy.
  • Bacon on the sandwich.

Have any suggestions, tips, tricks, or secrets?

If you were a lunch lady in the 80’s and know how to make/where to get that greenish-yellow glow-in-the-dark colored school cafeteria gravy, hit me up in the comments! I am super nostalgic for that,

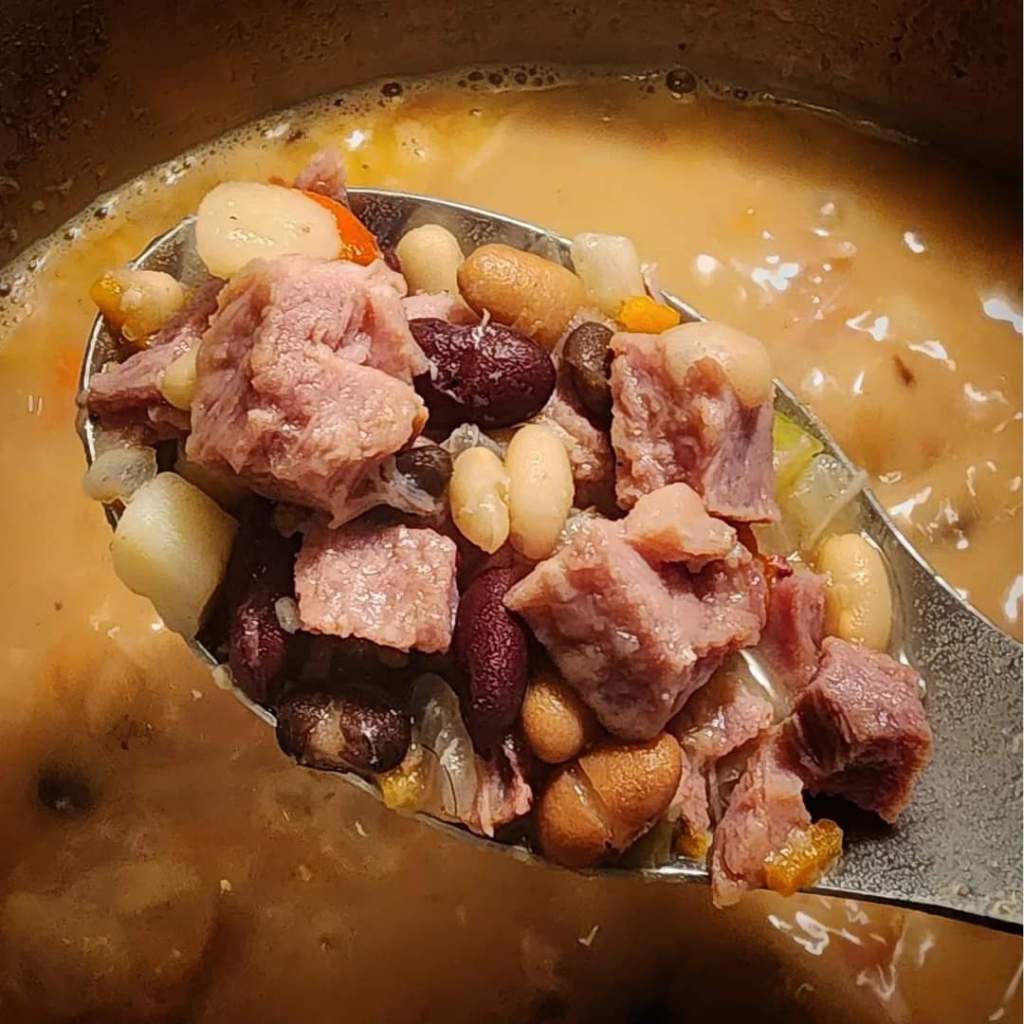
Ham N’ Bean Soup (Recipe) 🫘🥣


I made some ham n’ bean soup. I liked it more this time than last time. Here’ the recipe…

Every once in a while I get hungry for this. I make it slightly different every time. This time was pretty god, so I may replicate it. Or at least attempt to.

Ingredients:

  • 2 freezer bags of leftover ham from Easter, cubed.
  • 2 globs of Irish butter using a tablespoon.
  • Spanish onion, diced.
  • A stick of celery, chopped
  • Shredded carrots, chopped even smaller
  • 1 red bell pepper, cubed
  • 1 tsp. of minced garlic
  • 7 cans of beans. I used the Giant Eagle brand. I got butter beans, black beans, pinto beans, navy beans, kidney beans, great northern beans, & cannellini beans. I thought about garbanzo beans and black eyed peas.
  • 1 can of diced potatoes.
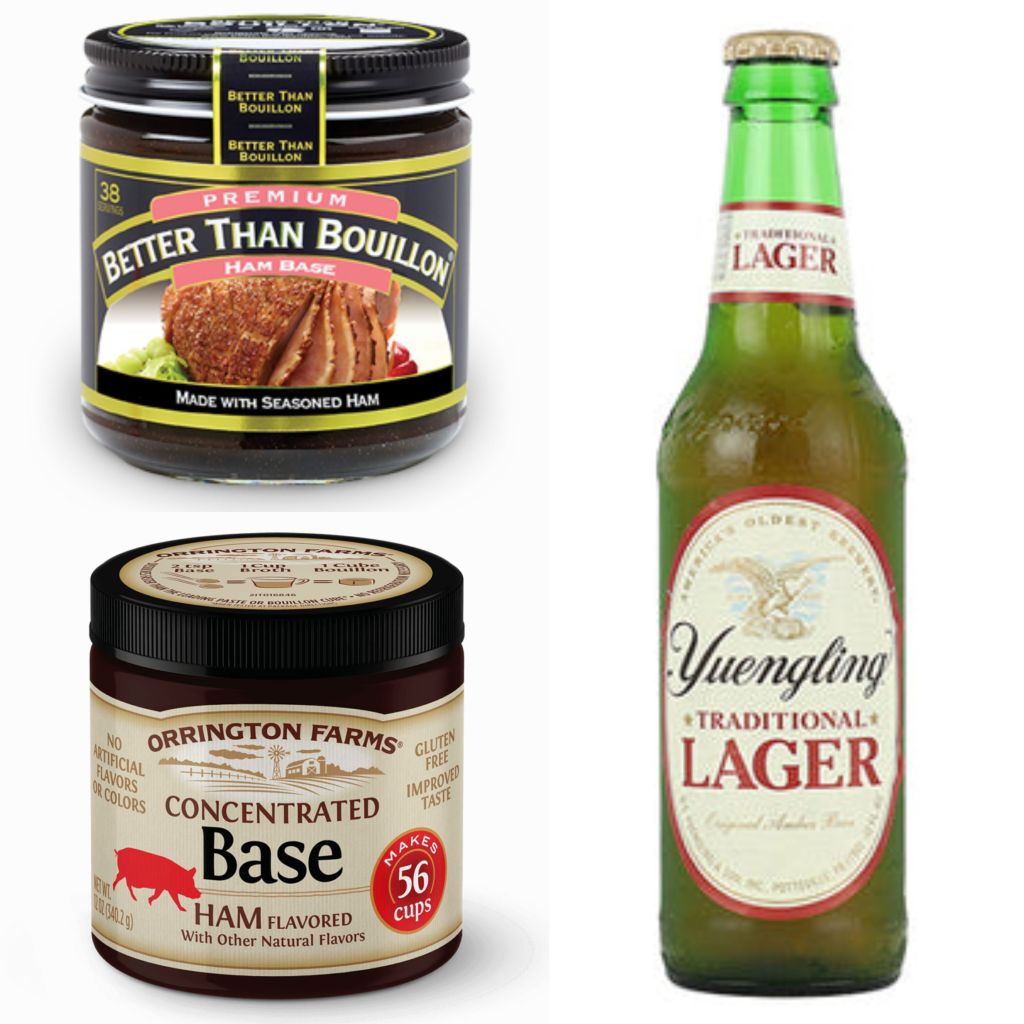
  • 1 bottle of Yuengling Traditional Lager (Sometimes I cook with Straub Amber too.)
  • 12 cups water
  • A tablespoon of Better Than Bullion Ham Base
  • 2 tablespoons of Orrington Farms Concentrated Ham Base
  • Mrs. Dash Table Blend seasoning (to taste)
  • McCormick BBQ Seasoning (to taste)
  • Ground Mustard (to taste)
  • White Pepper (to taste)
  • Salt (to taste)
  • Pepper (to taste)
  • garlic powder (to taste)
  • onion powder (to taste)

I’m impatient so I didn’t use dried beans and soak the overnight while standing on my head facing east while reciting a mantra about not farting after eating this soup or whatever you have to do to do all that properly. Ain’t nobody got time for that. I did drain & rinse them really well. I’m sure this would be fine with ham steaks but the roasted ham from Easter was delicious.

The Method:

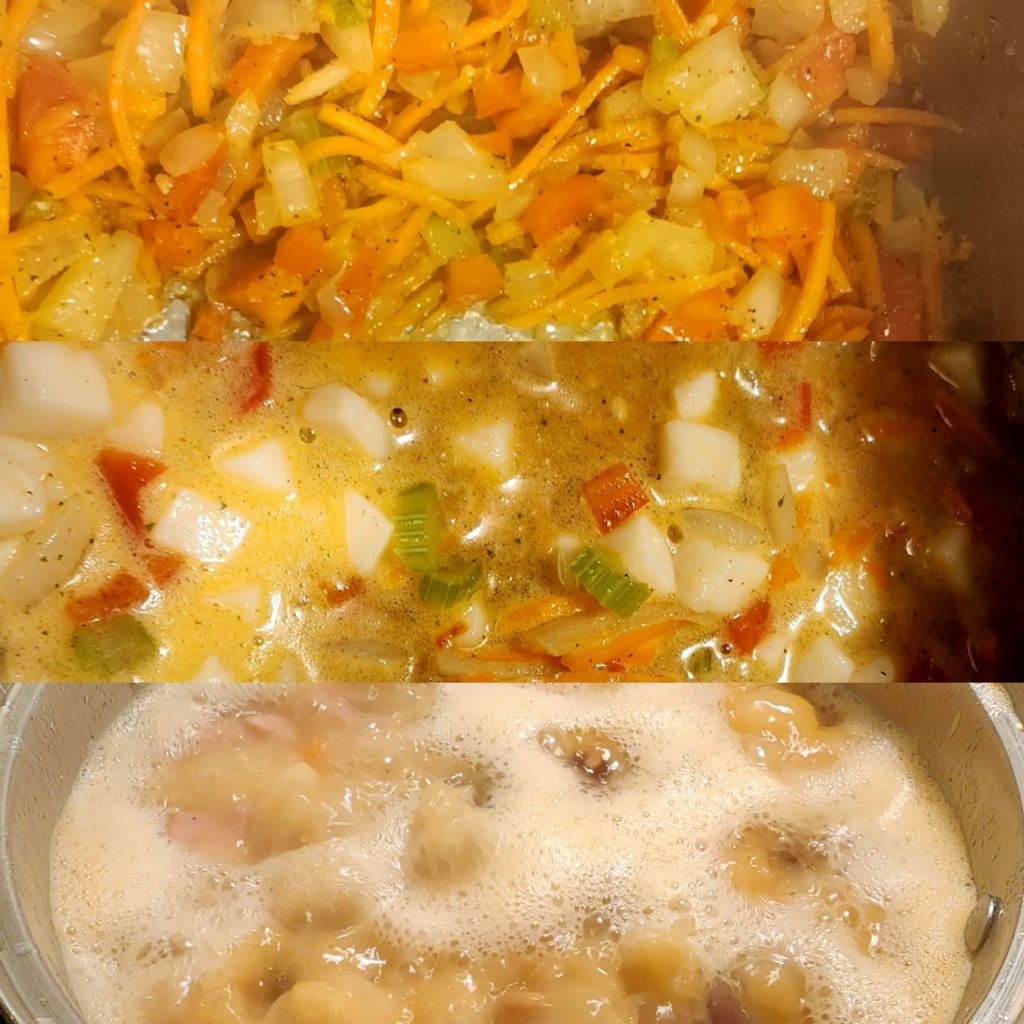
Sauteeing the veggies, adding potatoes, then beer.
  1. I dumped all the beans into a colander and mixed them, then rinsed them pretty good with cold water. I set that aside on a bowl for a minute.
  2. I globbed the butter into the stock pot, put it on a burner, and cranked that shit up to medium-high.
  3. As the butter was melting, I added the onions, and let them sautée a bit. I added some onion powder, garlic powder, and a bit of salt here.
  4. I added the carrots, celery, & bell peppers, then sautéed a little more.
  5. This is where I added the rest of the spices to taste. Use whatever floats your boat. I added the minced garlic last so it didn’t burn.
  6. I tasted this before I did anything else and did so by setting aside a spoonful to cool while I moved on to the next step. I could have eaten just this.
  7. I dumped the canned potatoes along with the water into the mix.
  8. I dumped the beer into the mix.
  9. I got 8 cups of water into a giant mixing cup & added the “better than bullion” and soup base stuff. I went a bit lighter than the directions specify because I always end up making the soup too salty. I also didn’t use a measuring spoon. I used regular spoons & serving spoons. What is this, baking?
  10. I added all the beans, and 4 more cups of water.
  11. I added the ham last as I cubed it. I think at some point I cranked the heat down to medium.
  12. After adding the ham, I brought it to a boil on high, then let it boil on medium-low for 20 minutes, lid off, then pulled it off to rest.
  13. If you’re worried about the taste, take a bite way too soon, scorch your tastebuds, and it won’t matter anyway.

This was pretty tasty. I would only maybe add bacon? Manybe peas or something? What would you add? Would you switch anything out? I’m sure chicken bullion or broth would be good here too.

I like to serve this with some buttered rolls, or even a sandwich. Maybe cornbread would be good too?

This is good, but not much tops ham n’ green bean n’ tater stew. I wonder if green beans would be good in this?