German-Style Hot Potato Salad


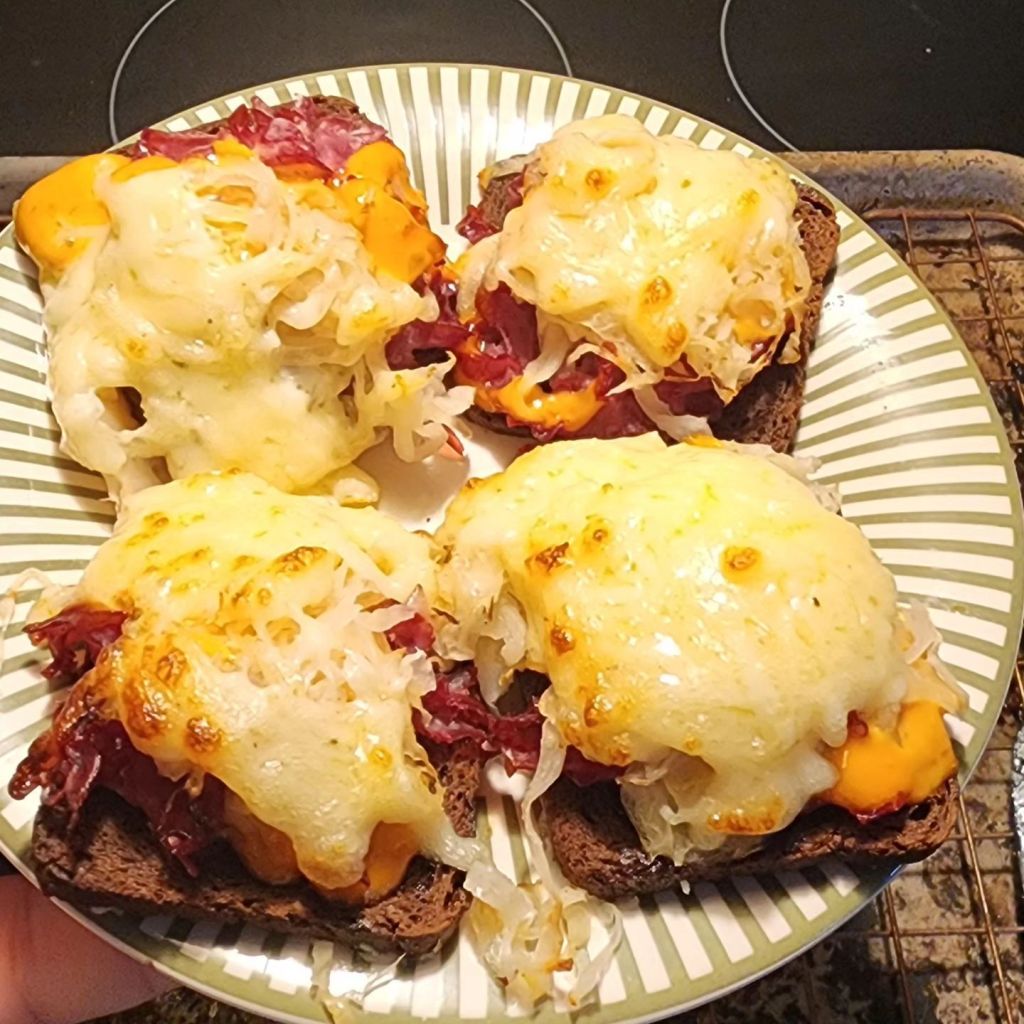
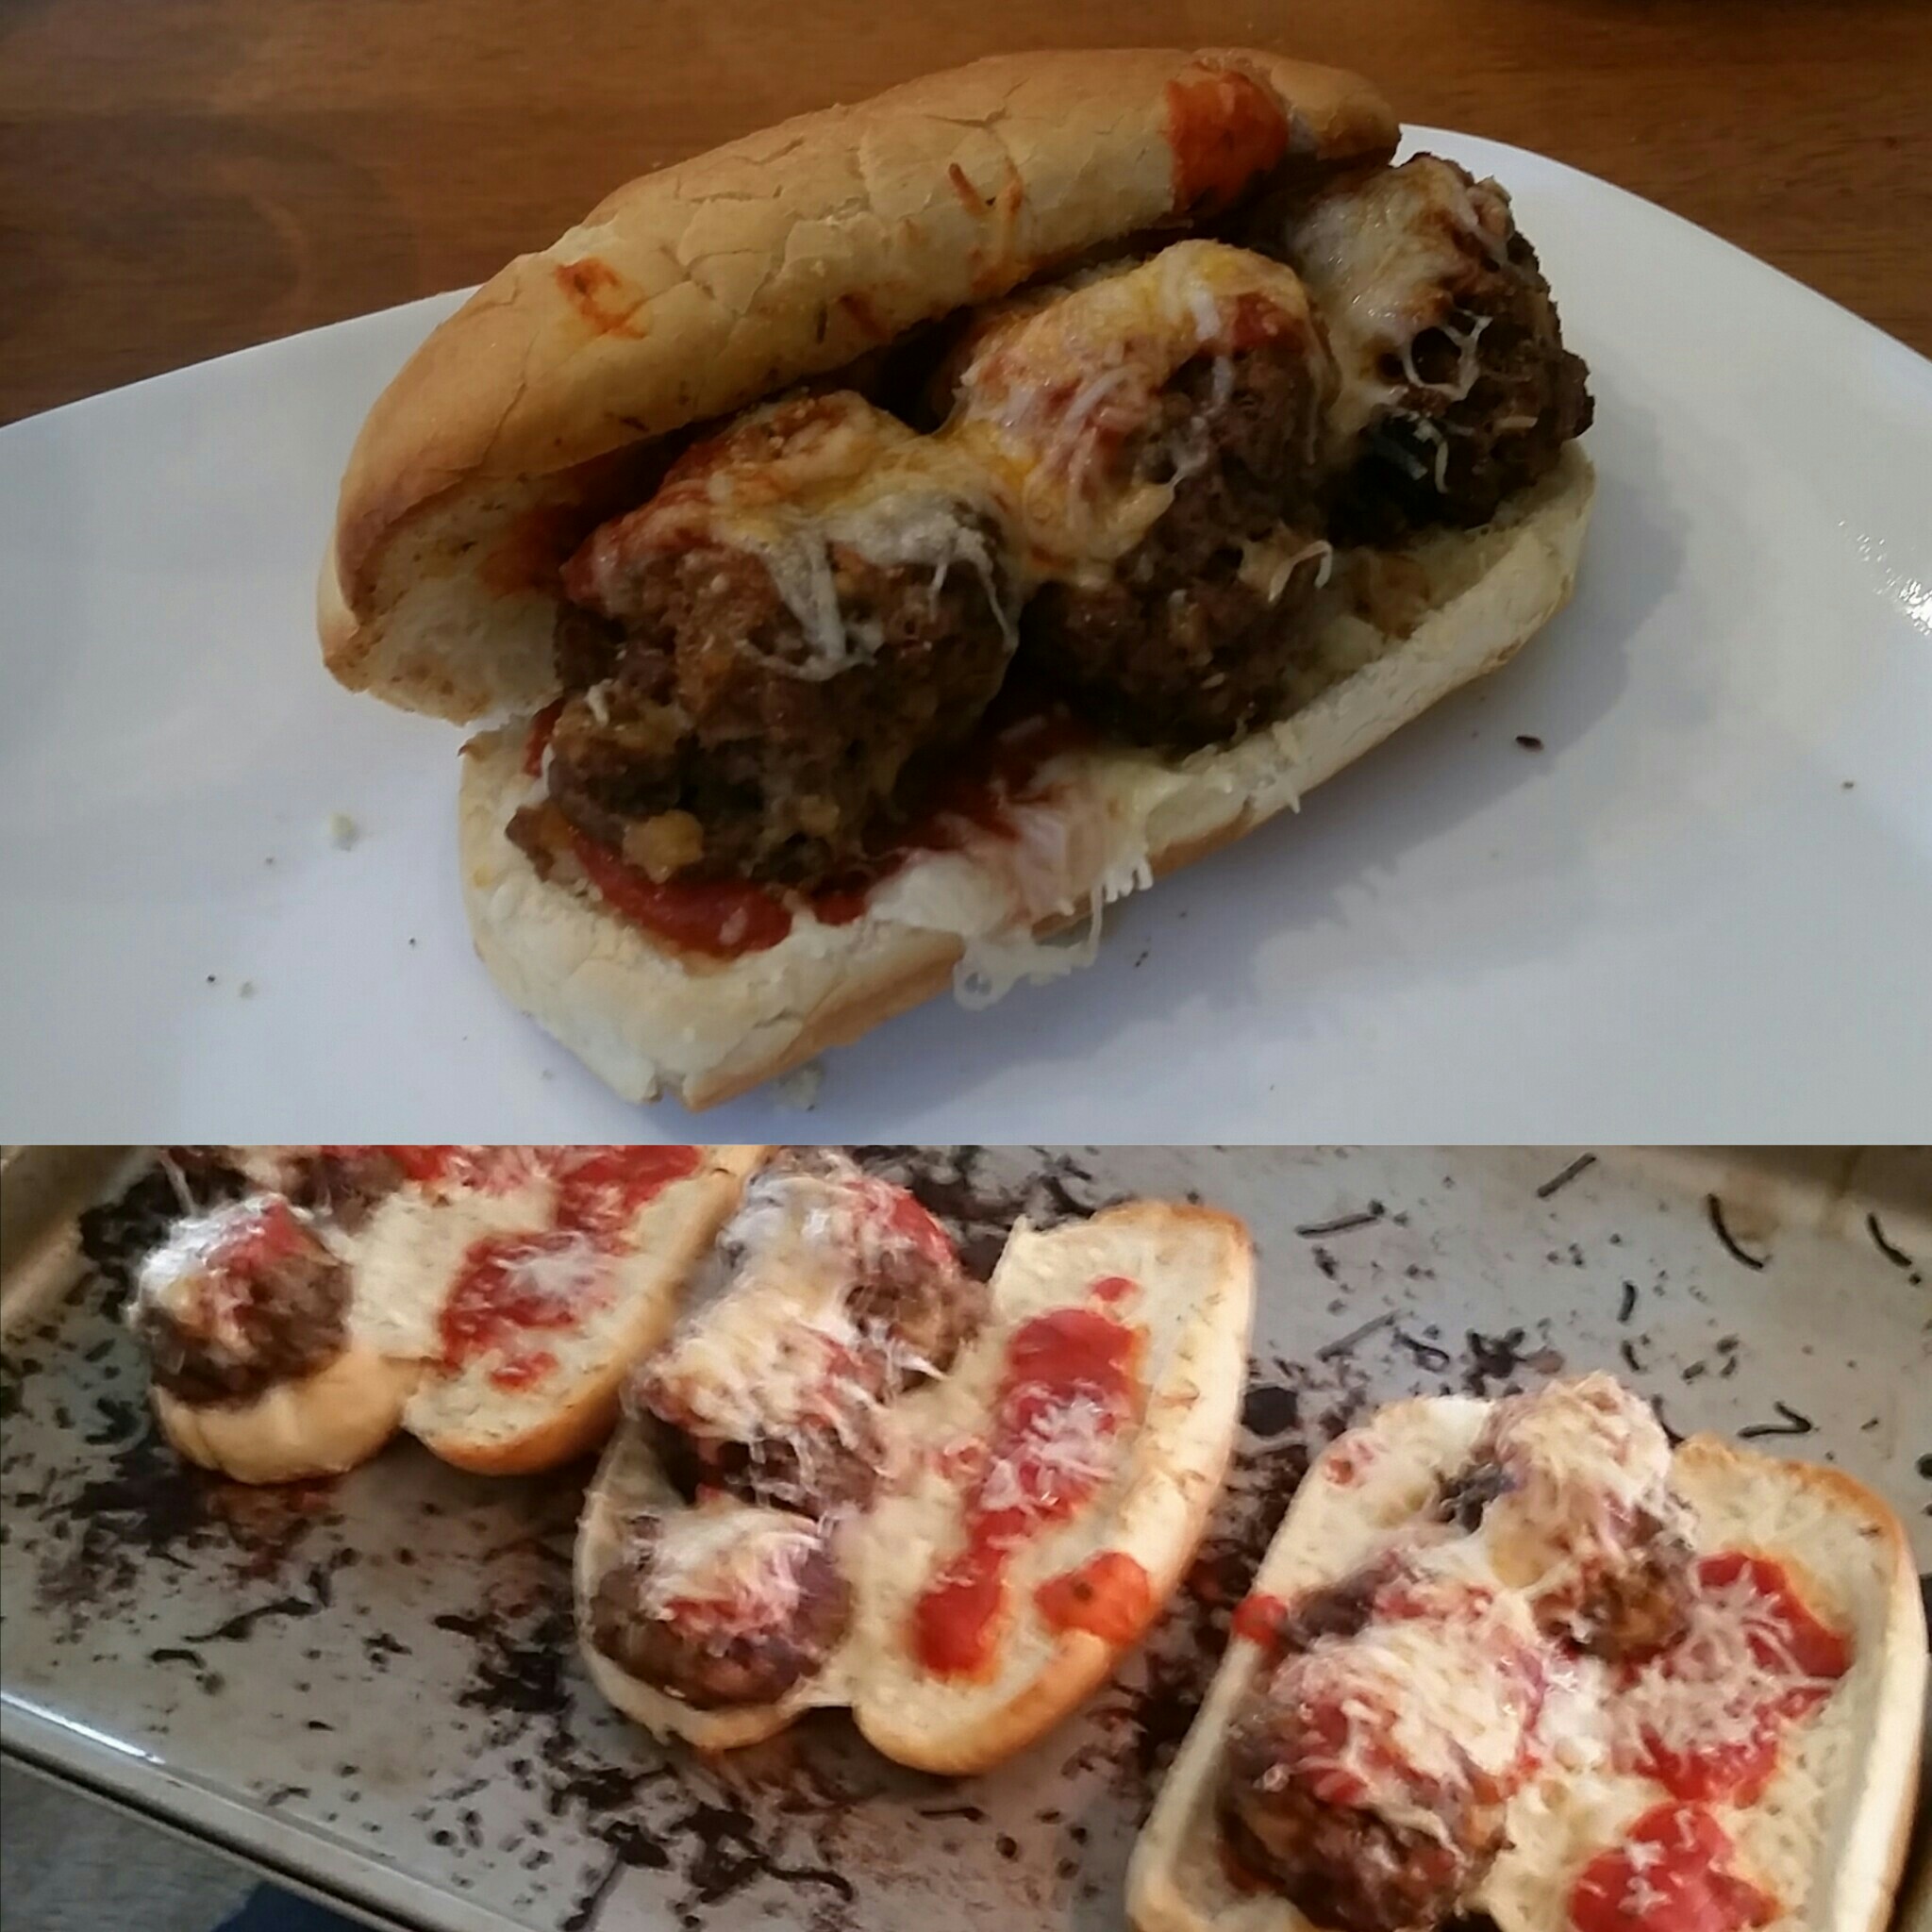
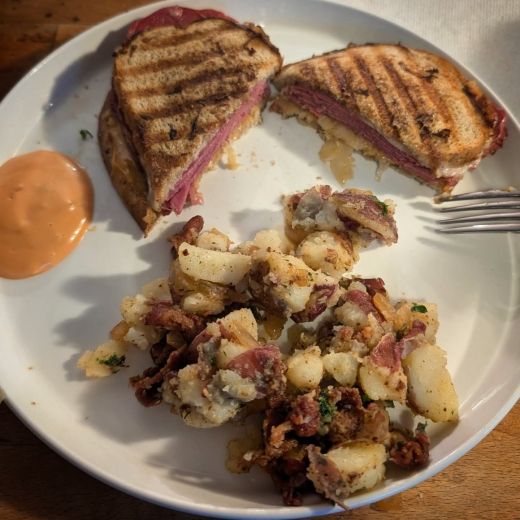
I was in a cooking mood last weekend, and I tried out some hot German style potato salad. As usual, I googled recipes, solicited advice on Threads, and even bounced stuff off of LLM’s. I came up with the recipe below, and it paired nice with some Reubens. The bread on the Reubens was less than stellar. I need to get some better rye, & make sure it’s still seedless. (Thanks, diverticulitis!) Maybe marbled or Pumpernickel is the way to go? I’m not much of a baker, unless it’s as easy as the Cheesy Beer Bread.

Hot German-Style Potato Salad

OK. So here’s what I did:

Ingredients

  • 2 lbs. red potatoes
  • 10 strips thick-cut bacon, chopped
  • 1/2 of a Spanish onion, finely diced
  • 1/2 cup chicken broth
  • 1/4 cup white vinegar
  • 1 tablespoon sugar
  • 1 tablespoon Dijon mustard
  • 1 teaspoon ground mustard
  • Salt, Pepper, Onion Powder, & Garlic Powder to taste
  • Dried parsley to taste
  • Fresh chopped parsley

Instructions

  1. Put the whole potatoes in a large pot and cover with about 1 to 2 inches of cold, salted water (or chicken broth for extra flavor). Bring to a boil and cook until the potatoes are tender when pierced with a fork, about 15-20 minutes. Drain the potatoes well and set them aside. (Next time I will add the other half of the onion here. I did add a bit of ham bullion to the water.)
  2. While the potatoes are cooking, place the chopped bacon in a large skillet or pan over medium-low heat. Cook until the bacon is crispy, stirring occasionally to ensure even cooking. Using a slotted spoon, remove the bacon pieces and place them on a paper towel-lined plate to drain, but leave the rendered bacon grease in the skillet. (I may have snuck in a tiny bit of butter here.) This seemingly takes forever but is worth it. I seasoned the bacon with onion powder, garlic powder, & black pepper.
  3. Add the diced onion to the skillet with the bacon grease. Cook over medium heat, stirring often, until the onion is soft & translucent.
  4. To the skillet with the onions and bacon grease, add the chicken broth, white vinegar, sugar, Dijon mustard, and ground mustard. Whisk the mixture to combine. Bring the dressing to a simmer and let it cook for about 2 minutes to allow the flavors to meld. Season with salt and pepper to your liking. I put the dried parsley in here, too.
  5. Dice, the still-warm potatoes into large 1-inch-ish chunks, then place in a large bowl. Pour the hot dressing over the potatoes and gently toss to coat. Stir in about half of the cooked bacon pieces.
  6. Let the salad sit for at least 15 minutes to allow the potatoes to fully absorb the flavors. Just before serving, sprinkle the remaining crispy bacon and fresh chopped parsley or chives over the top.

The fresh parsley made it pop. Of course, you could use Yukon Gold or whatever potatoes you have. Watch out for green ones!

I wondered if honey mustard would be good? Obviously brown mustard or German mustard or even yellow mustard should be fine. I wonder what Herlocher’s would be like? Apple cider vinegar or brown sugar should be fine too. I see proponents for and against just about every variation online.

I say use what you have on hand or what you know you like. I bet I used Mrs. Dash’s table blend at some point, too. Some recipes recommended wine instead of broth. I may try it with beer?

Is this one you make often? Have you ever tried it? What are your tips & tricks? Luckily both kids liked it, so I’m sure I’ll be making it again. Also… I really didn’t measure much…. I just go.

Hit me up with your take on the Reuben, too! I have made them a few different ways, but always with the same basic ingredients.

Reuben Sandwich & Hot German-Style Potato Salad

Also, this is a hilariously appropriate song to rock to while you’re cooking:

It’s tangential, but made the cut for my Fast Food Punk Tunes & Dad Shit playlists!

Campfire Cookin’!


We recently went camping, and one of my favorite things to do when camping is cooking over a campfire. We did hobo packs the first night and mountain pies the second night. Both nights were a hit with the whole family.

I’ll show ya what we did if you tell me how you do it. Although, I did already solicit mountain pie recipes in 2018.

Hobo Packs

Pretty much anything you throw in foil packet and toss over a campfire will work here. You can go right on the coals, but this was a recent fire, so I put them on a grate on top. There’s 2 layers of heavy duty foil here, but you don’t want it over a direct flame. These would work great on the grill too. I went for 30 minutes, flipped it, & let it go another 30 minutes.

I was looking for stew meat or cubed beef in the grocery store, but the Aldi on the way to the campground had beef that was marked as “Good for Carne Asada” and it looked perfect.

Ingredients:

  • Beef
  • Onion
  • White Mushrooms
  • Russet Potatoes
  • Red Bell Pepper
  • Orange Bell Pepper
  • Carrots
  • Zucchini
  • Butter
  • Spices!
    • Black pepper
    • Season salt
    • Onion powder
    • Garlic powder
    • Mrs. Dash’s Table Blend

What would you put on yours?

Mountain Pies

I have made mountain pies many different ways, but this time we went with the classic pizza ones, and some Italian sub ones for dinner. Everyone went rogue for dessert.

Mine were done up proper…

  • Pizza Mountain Pie
    • White bread
    • Pizza Sauce
    • Shredded Mozzarella
    • Pepperoni
    • Roasted Red Peppers
    • Black Olives
    • Mushrooms
  • Italian Sub Mountain Pie
    • White bread
    • Ham Lunch Meat
    • Salami Lunch Meat
    • Pepperoni
    • Turkey Lunch Meat
    • Sliced Provolone
    • Roasted Red Peppers
    • Black Olives
    • Italian Dressing
  • Banana Split Mountain Pie (This is the one I had!)
    • White bread
    • Jif Choclolate/Peanut Butter Spread
    • Sliced Banana
    • Mini Marshmallows
  • Strawberry Chocolate Mountain Pie
    • White bread
    • Sliced Strawberries
    • Hershey’s Choclolate
    • Powdered Sugar (on top)

In the past I’ve made Mountain Pie Reubens (on rye), baked bean pies, leftover vegetable soup (thickened up) pies, apple pies, peach pies, peanut butter cup pies, breakfast (eggs & ham) pies, and probably more. The possibilities are endless. Sloppy Joe? Chipped ham BBQ? Grilled cheese? Ham n’ cheese? Turkey melt? Cheesesteak? Hot PB&J? Hot dog & baked beans? Biscuit dough around something? How do you do yours?

Of course, this doesn’t cover all the possibilities of campfire cooking. There’s hot dogs, s’mores, campfire banana splits, campfire corn, baked potatoes, & more. What do you do over your campfires?

We recently had a blast at Forest Ridge Cabins & Campgrounds & would love to go back for more!

I’m actually contemplating getting a cheap electric countertop sandwich grill that seals the edges to make indoor mountain pies.

Cocktail Rye Bread Appetizers


So, did you read my rant and see my maze when Pepperidge Farm stopped making their cocktail-sized rye bread? Giant Eagle must have heard me, because they had S. Rosen’s Rye & Pumpernickel in stock this year. Sadly, their rye isn’t seedless, but I made due with the pumpernickel.

At any rate, this is what we use them to make:

Here’s a very fast & loose recipe/method:

Get it:

  • Cocktail Rye bread and/or Cocktail Pumpernickel bread.
  • Bag of shredded cheese – we got Swiss & Gruyere. Havarti, Swiss, Mozzarella, or Provolone would be fine.
  • Mayonnaise and/or Miracle Whip.
  • Lemon Pepper
  • Thousand Island dressing
  • Sauerkraut
  • Corned Beef lunch meat

Do it:

  • To start both, we mix 2 cups of shredded Swiss & Gruyere cheese with a few Tablespoons of mayo. I’ll use Miracle Whip too.
  • I put the cheese mixture right on the rye, & sprinkled on some lemon pepper.
  • I put some corned beef lunch meat on the Pumpernickel.
  • I put both on to a baking sheet that has a baking rack, and put it into a pre-heated oven at 375° on the air fryer setting for 5 minutes.
  • Took ’em out and the lemon-pepper rye ones were done.
  • I added Thousand Island dressing, sauerkraut, & the cheese mixture to the Reuben ones and put ’em back in for 3 minutes at the same temp & on the same setting.

They’re always crowd-pleasers, and you really can top them any way you like. You can just bake ’em too, or use a counter-top air fryer. My wife brought them to me as a tradition from her family, I made Reuben ones, because… Reubens, am I right?

And remember, I’m always right.

Pumpernickel is cool because it essentially is named for the devil’s farts… and if that’s not cool, I don’t know what is. This is also code in my household for “I am always right.” I told my wife the name origin behind it, she said there was no way, Googled it… and, like I said… I am always right.

Me – from the old Rye bread post.

Thanksgiving Dinner! – The Recipes.


I love to put together a holiday meal, especially thanksgiving. I have it down pretty good to corral the chaos.

First prepping the turkey & stuffing…

I do the bird in the electric roaster, stuffed, for 15-ish minutes per lb. @ 325° Farenheit. I roasted in the preheated pan on full for about 45 minutes at the start before turning it down. I inject the turkey in a few sports with a mixture of melted beer, butter, & spices. I usually rub some softened butter on top and toss on lots of seasoning there too. I usually pour a bottle of beer and a box of turkey broth in the bottom, & include some carrots, celery, & an onion.

Don’t worry about samonella with a stuffed bird. Take it to 165°. Always use a food thermometer. Some of the dark meat of the turkey will be overcooked but it will still be juicy & delicious. I haven’t killed anyone with my turkey yet.

The extra stuffing can be made into stuffing balls, but I put it in the crock pot. You just have to stir it, & maybe add extra turkey or chicken broth if needed or it will stick to the sides a lil’ burnt.

Do the math, & time it so you’re pulling the turkey out about a half an hour before you want to serve it.

Then I make the sides. Check out my recipes!

I cut up the butternut squash first, & put it in the fridge for when I needed it.

I peeled & quartered the potatoes, let them sit in cold water (& turkey broth).

Cut up & prep the brussels sprouts & carrots, you want to pop them in about 45 min before you plan to eat.

Prep the squash & put it in right after the brussels sprouts.

Turn on the potatoes, by the time they cook & you do your thing… it the other stuff should be ready to go.

Others brought even more sides… cranberry sauce, green bean casserole, sweet potatoes, deviled eggs, & rolls!

If I make green bean casserole, I pretty much use the Campbell’s recipe or French’s Fried Onions recipe… sometimes with an added can of mushrooms, fresh green beans, & maybe even some bacon pieces or ham.

If I cook with beer it’s either Yuengling Traditional Lager or Straub Amber.

For the gravy, I just use pan drippings broth from the turkey, and eyeball together a slurry of corn starch, add it, & some more spices if needed.

Someday I am going to brine a turkey with a buttermilk brine & cook it on the smoker, but… not for Thanksgiving. Well, not the first time anyway.

I like to keep the oven open for sides, & any brought sides or pies that may need warmed up.

Thanksgiving Sides!  Brussels Sprouts & Rainbow Carrots, Butternut Squash, Mashed Yukon Gold Potatoes, & Stuffing!
Thanksgiving Sides! Brussels Sprouts & Rainbow Carrots, Butternut Squash, Mashed Yukon Gold Potatoes, & Stuffing!

What are your Thanksgiving or other holiday meal prep tips, go-to’s, methods, or favorite recipes?

🦃 Don’t forget these free Thanksgiving Mazes! 🦃

Nostalgia & Stuffing


I hope you have seen my stuffing recipe, and I hope to blog the method for all my sides. I was digging for these, and I thought I’d post it here for posterity. My Grandpap King was always the one who did holiday meals. He passed away when I was very small, but my Grandma always used his stuffing recipe, and that’s what I use today. I’s very simple, and it came from a Westinghouse cook book. I have a terrible photo copy of the book with his notes in the margins where he extrapolated to make a much larger portion. I want to use that small one to make stuffing ball sliders.

Scan of an old photocopy of a stuffing recipe.

Here is is zoomed in a bit, & cropped…

old stuffing recipe

Here’s notes from an email from my mom…

stuffing recipe

My uncle found a copy of the book at an auction or garage sale… It’s the first edition, when looking at the photocopies wasn’t what my family originally had, but it is the same recipe.

Westinghouse - Stuffing Recipe

Share some of the recipes that you have had passed down!

Happy Thanksgiving and don’t forget to enjoy some Thanksgiving-themed mazes before or after dinner!

This is a preview maybe of how I make the sides…

#MeatballSub #Recipe


So, I’ve been hungry for meatball subs.  They’re so simple to make, but we just never seem to do it at home.  I shared the photo on social media, because I’m weird like that and it annoys people, and some people seemed to dig it.  wanted to share how easy it was with a minimal amount of effort.

So, the wife got a pound of ground meat from Aldi the other day, and I picked up the rest of the stuff that we didn’t already have at Giant Eagle on my way home from work.  I probably could have gotten all of this from Aldi.

So this is what I used…

  • 1 lb. of ground beef
  • a handful or two of finely shredded fancy 6 cheese “Italian” stuff – I started with a 2 cup bag.  We always have this or something similar around.
  • Whatever “shake cheese” you put on spaghetti. I have Parmigiano-Reggiano because they think it needs to sound fancy.
  • A handful of crackers.  We had “club” crackers from Aldi
  • Italian Dressing (we seem to really dig Kraft Roasted Red Pepper Italian)
  • A jar of cheap-ass pizza sauce  (I probably should have used some better marinara sauce)
  • Spices (Season All, cracked black pepper, onion powder, garlic powder, salt, Italian seasoning, paprika …whatever floats your boat.)
  • Brown sugar
  • Sub buns (I like the Cellone’s or bakery ones, but I was being cheap this shopping trip and got some weird mass-produced ones.)
  • EVOO
  • Butter

And this is what I did…

Meatball Subs

MEAT.

Turn the oven on first so you don’t have to worry about it later.  Put it on 375° because that’s always what they seem to say to put it on.  I don’t know why.  I don’t even know who they are.

I made some meatballs with the meat, some hand-crushed crackers, a dash of the pizza sauce, a dash of Italian dressing, a dash of whatever spices I grabbed off the rack (probably pepper, season all, onion powder, garlic powder, and paprika), a bit of the Parmesan shake cheese and the mysterious “six cheese Italian” stuff.

I put some spices on the outside because why not, and tossed them into a frying pan with EVOO and a small pat of butter on the bottom.  I pre-heated it to high, then turned it to 6 before I tossed in the balls.  6 is at about 6:00 on my stupid electric stove top.

I melted a bit of butter in the microwave.  I quickly cut open the buns, put them on a baking sheet, spread on some melted butter with a brush and added… garlic powder, onion powder, a dash of shake cheese, and “Italian seasoning” to the buns.  No Italian seasoning for my wife, and no garlic powder for my 2½ year old.  I popped them in the 375° oven on the middle rack for a bit.

I used tongs to turn the meatballs over & popped a lid on the pan.

I dumped the remaining pizza sauce into a soup cup (it was a little jar), and added a sprinkle of brown sugar.  I nuked it for 45 seconds or so.  Why?  I like sweet sauce, and grandma always said “it cuts the acid.”

I turned the meatballs on to an undone side, and got the sub rolls out of the oven.  I knew they were done because… I didn’t even look at them.  I just took them out.  They looked fine.  Plus, we’re not totally finished.  I added some pizza sauce and some of the finely shredded awkwardly named cheese to the buns.

I made sure the meatballs weren’t going to kill us with the food thermometer.  They weren’t.  I put those on the buns and added more sauce, shredded cheese, and shake cheese.

I set some meatballs aside for my 10 month old.  The sandwich was a little much for him, but he will eat just about anything you put in front of him.  Seriously.  even if it’s not edible.

I put the now built subs into the oven and cranked the knob to 400° because I am impatient and my 2½ year old kept asking if lunch was ready.  I turned the light on in the oven and watched the cheese melt.  Not only was that fun, I could also make sure I wasn’t going to burn the bejesus out of things.  I didn’t.  I took it out in time.

Well, some of the cheese that fell on to the baking sheet burned, because I made a mess.  Oh well.

These were pretty good, although next time I will use different/better sauce.  That squeeze stuff isn’t bad.  Maybe I can make a simple marinara.  Also, homemade-ish deli rolls or Cellone’s are worth it… and I would cut a little triangle out of the top like Subway used to, before we were over-saturated with them and they started to serve terrible cream-of-deathfish.

At any rate.  This is easy to do.  You could buy your own meatballs or bake your own bread or use cheese slices to make this as easy or as difficult as you like.  I cut my 2½ year old’s into 3 sections so she had sliders.  I cut my wife’s in 2.  I ate the whole thing in one big sandwich like a hungry hungry pig.  I refuse to apologize.

Share photos of yours or links to your own blogged recipe in the comments!


Forks vs. Croutons


I just found this amusing:

Is it weird that @Wendys' plastic fork can't p...

(Photo credit: eric_aixelsyd)

Wendy’s cares!  Ha ha.  Has anyone else ever run into this problem with impenetrable croutons?  I’m not exactly sure what they’ll be able to do about it.  Tougher forks?  Softer croutons?  Maybe I’ll get a free Frosty?  Will they start handing out sporks?  What about a metal Wendy’s fork that I can carry with me at all times?  I guess the possibilities are endless.

On a weird side-note…  Zemanta picked up my photo as a suggested image from Flickr.  How crazy is that?

Hamburgers vs. Meatballs vs. Meatloaf?


This thought came to mind while making hamburgers for the holiday.  I remembered the commercials for ranch burgers & I had a packet of the ranch dressing mix, so I looked up their recipe.  It contained breadcrumbs.  I always thought breadcrumbs belong in meatballs or meatloaf, but not hamburgers.  Then there’s egg.  I put it in meatloaf but not in meatballs or hamburger.  They’re all almost the exact same thing… but then they’re all completely different.

I generally always throw them all together without a recipe.  They’re easy to do that way.  I guess everyone has their own way to do things.  I make them all the same sometimes, but sometimes I add something different for fun.

I’m just wondering how other people do things?

I’d love some feedback in the comments below.  I’ll share how I generally do things.  These aren’t really recipes, and I don’t measure much, but this is typically what goes in each:

Hamburgers

Meatballs

  • Ground Beef (Sometimes Turkey)
  • Crushed Croutons (Whatever we have for the salad if we’re having one, or a nice mix of spices or whatever.)
  • Parmesan/Romano “shake” cheese
  • Kraft Roasted Red Pepper Italian Dressing (It spices them well, keeps them nice & moist!)
  • Black Pepper

Meatloaf

  • Ground Beef
  • Egg
  • Bread or crushed crackers.  (I like the bread ripped up more than the crackers.)
  • A1, Ketchup, Mustard, or BBQ sauce… or a combo of all of them.
  • Season All
  • Black Pepper

(Click here for a crazy meatloaf recipe.)

Of course sometimes I add garlic, or onion powder, or something crazy.  That’s the fun if it though, isn’t it?  So, what goes in your meatballs, hamburgers, or meatloaf?

Raw Ground beef

Raw Ground beef (Photo credit: Wikipedia)

Get Stuffed.


I can’t wait to make stuffing again. It’s ridiculously tasty. I love the carb overload. Maybe I will get those goggles, and I need to pick up some Yuengling.  A week from tonight, I should be in the process of creating this awesomeness.

I’ll show you my stuffing recipe if you show me yours.

How do you do it?

Maybe this year, I’ll try to make some Potato Filling too.  There are a bunch of recipes for it out there.  Maybe stuffing balls would be good…  Now I’m hungry.

STUFFING!

STUFFING!

Yuengling Lager

Beer

Stuffing Recipe – Thanksgiving 2009


Stuffing has got to be my favorite Thanksgiving food.  I remember Thanksgivings past where my dad & I would fight over the stuffing bowl like it was filled with gold, diamonds, and (for me) guitars.  The stuff is perfect.  Alone, with turkey, with gravy… the decadent amount of carbs is ridiculously awesome.

Last year was my first ever attempt at making stuffing… and my grandma told me that it tasted just like hers.  Is there a compliment better than that?  I had used as a guide an old recipe that my grandfather & grandmother had both used when making holiday meals.  My mom lent me the old cook book with my grandfather’s notes last year, I collected some others, and I made scans for myself (Updated URL).

I say “guide” because it’s not always an exact science when doubling/tripling recipes… and there really aren’t any cooking directions… it’s just a guide to make the stuff.  Also, I tend to do a lot of “oh, that looks about right” and a little bit of “hey, let’s add a little of this” in the kitchen, as most people comfortable there usually do.

A lot of times I see stuffing recipes online, on TV, or in the little books by the cash register at the grocery store… and they include sausage, apples, raisins, (yuck!) nuts, or even peppers, carrots, or mushrooms (all of the latter of which I’ like to try some time).  The philosophy behind this recipe seems to be a K.I.S.S. one.  I like that.  It’s a very simple accompaniment, and the taste that my mind goes to every time I think “stuffing”.

This year, it was definitely a two person effort.  I don’t know how I would have done it without Bethany and all four of our hands.  We made a lot of stuffing.  Sadly, I didn’t think to chronicle the thing with photos like I sometimes do with new recipes… but I did want to make a guide with my own notes, so when I do this next year, I remember what I did differently this year.  I know I altered things slightly last year, but the details were a little fuzzy.  I figured that if I’m going to do it for myself, I might as well share, right?  Plus, we got compliments from two moms, two grandmas, and an aunt… all excellent in the kitchen themselves!

I did take a photo today, because really, what’s a food blog post without a photo?  Perhaps I’ll see if my mom got any with her camera and amend the post later.

Thanksgiving Stuffing 2009

This year’s effort was delicious, if I do say so myself.

This is my first time really writing out a recipe… so pardon me if it’s a little convoluted or long winded.  I don’t want to miss anything, and I hope to get it all in the right order as well as make it an entertaining read.

Here’s what you’ll need to do it the same way I did…

Food:

  • 5 loaves of bread (equaled 56 cups once cubed)
  • 1 bundle of celery (3 cups, chopped – the rest can cook w/ the turkey or be a snack)
  • 2 Spanish or Sweet onions
  • The giblets & neck out of your turkey.
  • 1 can (14½ oz.) vegetable broth
  • 1 tablespoons of salt
  • ½ tablesppon Season All Seasoned Salt
  • 1 heaping teaspoon coarse ground black pepper
  • 1 heaping teaspoon sage
  • 1 heaping teaspoon poultry seasoning
  • 10 eggs
  • 4 sticks (2 cups) butter
  • some water
  • 1 cup fresh parsley
  • 1 bottle of Yuengling

Stuff:

  • 2 cookie sheets
  • cutting boards
  • small pot
  • electric skillet
  • Magic Bullet®
  • electric roaster
  • large crock pot
  • knives
  • a few large bowls
  • whisk
  • spatula
  • several large spoons
  • paper towels

OK, on to the directions…

  1. Monday night, get your loaves of bread, open the bags, and put the loaves on cookie sheets before dinner.  Leave ’em out on a table or counter while you do your thing.
  2. Right before your favorite prime time TV shows come on, set up a station on the coffee table in front of the couch with the cookie trays of bread, some cutting boards with knives, and the pans out of your electric roaster.  Cube the bread and fill the roasting pan.  When I say fill it, I mean fill it.  It will be ridiculously full.
  3. Cover it with paper towels, and set it on the kitchen table that you only use when company comes over anyway.  Over the next few days, stir it a few times a day, whenever you think of it.  This will get it nicely & slightly stale.  If you’re going to be doing anything that smells, like using cleaning chemicals, put it in the oven… but don’t turn it on.  It’s nice & warm & dry & not stinky in there.  The bread will absorb that stuff and the stuffing will taste like Mr. Clean made it.
  4. Wednesday night, get out your turkey… and pull the disgusting papery bag of giblets out of the neck cavity, and the neck out of its butt.  (Why exactly do they put the neck in the butt, anyway?  Who’s idea was that?) Boil the giblets in your can of vegetable broth, or just use plain water… or even turkey or chicken broth.  I thought the vegetable broth would add a nice flavor.  I boiled them for a nice long time, and let it cook down quite a bunch.
  5. Finely chop up your celery & onions… or use the Magic Bullet, like I did.  I’m not real big on chunks of slimy or crunchy stuff in bread-like consistency foods.  I probably had half of each chopped finely, the other half rendered to near-paste by the genius little piece of equipment that list the Magic Bullet.  I’m sure any food processor would work.. but this one is easy to pot pout of storage, use, and clean when you’re done.
  6. Then I popped out the electric skillet to sauteé the onion & celery mixture… probably in some Country Crock & a bit of extra virgin olive oil… adding some of the spices mentioned above, and maybe even some paprika… although, they don’t come the totals listed above.  These are the aforementioned “oh, that looks about right” and  “hey, let’s add a little of this”.  You’ve sauteed stuff, you know how it works.  I love this step because it turns the onions from gross into awesome… especially the Spanish onions.  The sweet onions are oddly enough not as sweet to me when cooked.
  7. Next time, I’m totally getting a pair of swimming goggles or those glasses that I’ve seen at Bed, Bath & Beyond for when I chop & pulverize the onions.  I was crying like a little girl who just watched a car run over a kitten.
  8. I popped the onions and celery into separate containers for the ‘fridge to save for Thursday morning.
  9. Next, I pulled out the giblets and chopped them into tiny pieces, & put them with the reduced broth from cooking into a 3rd refrigerator bound container to be used on Thursday morning.
  10. Go to bed.  You have to get up early.
  11. Thursday get up about an hour before your turkey needs to go in the roaster oven, and start to mix all this crap together.
  12. Add the dry spice ingredients to the now stale-ish cubed bread.  Good luck not getting any on the floor.
  13. Chop the fresh parsley.
  14. Nuke your butter in a microwave safe bowl, add it to a large mixing bowl, crack open the 10 eggs, and whisk away.
  15. Add the fresh parsley to the buttery gooey egg mixture.
  16. Add 2-3 cups of the broth from the giblets, and the finely chopped giblets to the now even gooier butterier egg mixture.
  17. This is where I got the bright idea to dump in some Yuengling.  It wasn’t a whole bottle… but I had it out & only needed about ½ cup for my butter/garlic/beer turkey injection/baste,  so I dumped some into the gooey buttery gibletey mixture, and drank the rest… all before 8:00 am.
  18. Dump the celery & onion concoction on to the bread, mix around, and then dump on the gooey buttery gibletey Yuenglingey mixture.  This is where it was imperative that there were two of us.  Bethany opted to use her hands to mix while I poured.  The mixing gets easier when it’s wet, as it goes down a little.  You should probably wash your hands before you do this.  Not that I think you’re stupid or anything… but there are signs out there all over the place… so someone somewhere must need reminded.  Use soap, and hot water.
  19. Now, this needs to come out of the roaster so the turkey can go into it… and you should be doing this around the same time as turkey prep… so stuff what you can into the turkey carcass’ various cavities, and put the rest in the crock pot.  I had Bethany scoop it into a bowl small amounts at a time as I stuffed it into the bird, so I wasn’t touching raw poultry and the stuffing that wasn’t going into the bird.  She made it clear that she wasn’t touching the raw dead bird, or sticking her hands into it.
  20. I sewed up the turkey and popped it into the roaster to cook, and then put the stuffing in the crock pot on low to cook for the same amount of time.
  21. Everyone told me last year that stuffing + crock pot = bad idea.  This is where I say that you could not be more wrong.  It was perfectly moist and heated well throughout.  I did break the cardinal cock pot rule by removing the lid every hour or so and stirring a little so it didn’t stick to the sides or burn.  This worked well, except that I didn’t get the bottom well enough.  You could add more liquid throughout if t looked necessary… or not stir if you like the crusty part as much as the other part.  If you use the crock pot enough, you get to know what works for yours.  Pop it on to warm or off a while before you eat.
  22. When the turkey’s ready, the stuffing’s ready.  Stuff yourself silly, send people home with leftovers, and eat for breakfast, lunch, & dinner the next day.

Well, I hope you enjoyed the process, and I’m sorry for jumping tenses.  I think I did anyway.  All over the place.  Maybe Dave and Kristin can give me some pointers on that.

I’d love to know what you think of this recipe, and how you do your stuffing.  I’m always up for trying things new ways… and I’m always up for eating stuffing.  In fact, even better — make some, and invite me over for dinner!